Sign-in to your TIDWIT ecosystem instance:

En la esquina superior izquierda, haz clic en el botón de Menú. El panel lateral izquierdo se mostrará, y verás iconos correspondientes a las diferentes aplicaciones y cargas de trabajo disponibles en TIDWIT. Los tres primeros iconos corresponden a la sección de Usuarios, la cual se explica en el Manual del Usuario. Los iconos restantes solo son visibles con un perfil de administrador. Si no puedes verlos y eres un administrador, pídele al administrador del portal TIDWIT que te otorgue los permisos necesarios.
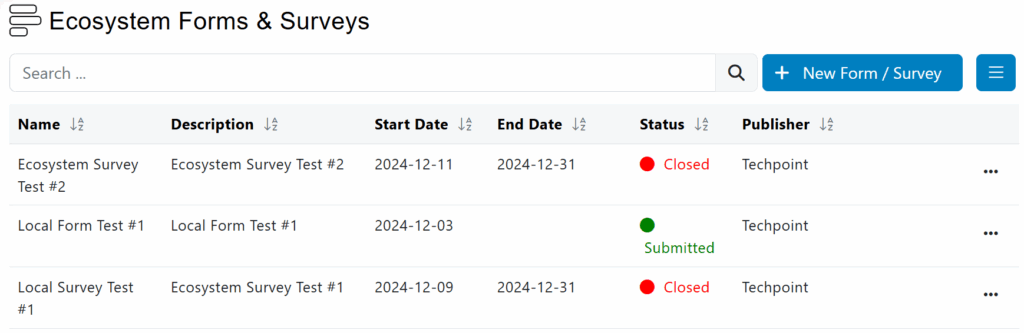
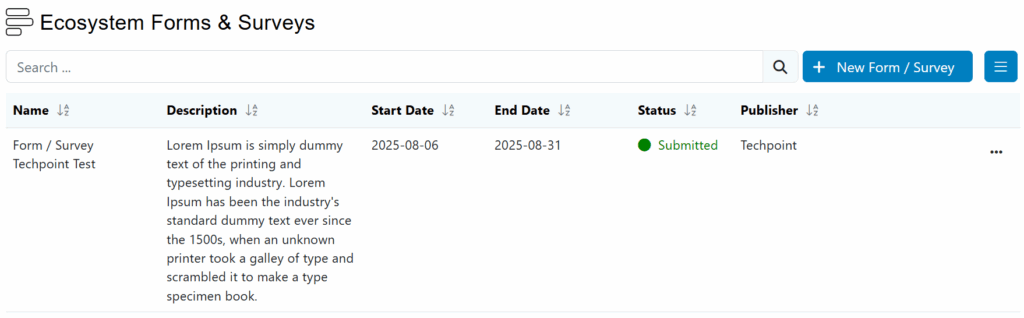
Ecosystem Forms & Surveys Main Page
Para ir a la sección de Ecosystem Forms & Surveys main page, place the mouse pointer over the corresponding icon, click on the Manage Forms & Surveys option and you will be redirected to its main page. The first thing you will see is a list of all the created Forms to date and their status.
Create a new Form / Survey
Pestaña General
To create a new Form / Survey, click on [ + ] plus button on the upper right corner of the screen and a new interface will be displayed.
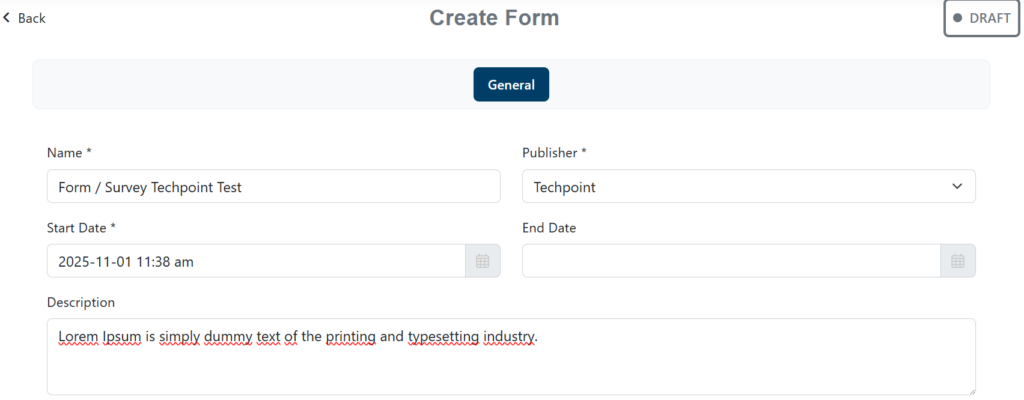
Fill in all the required information marked with an asterisk (*).
- Write the Nombre you want to give the Form / Survey
- Choose the Publisher
- Select the Fecha de Inicio, to define when the emails will start being sent out
- Select the Fecha de Finalización when the system will stop tracking the Form / Survey (optional)
- Write a description for the Form / Survey (optional)
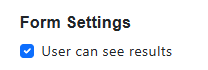
Form Settings
If you want users to view the results of the form or survey, check the “Users can see results” option.
Access Options
Private: Only registered node users are allowed to submit their feedback. This option is useful if your main target is an internal audience. Note: If the node is configured to allow user self-registration, non-registered users can register to the node before submitting their feedback.
Public: Anyone with the link can populate the form/survey and submit their feedback. User email is required to prevent multiple submissions from the same user. This option is useful if you need to promote the form/survey to an external audience through social medias, online events, print etc.
By Invitation: Only users who’ve received an email invitation with a link to the form/survey are allowed to submit their feedback. This option is useful if you need to control your target audience and restrict submissions to a defined list of users (internal and/or external). Note: Users accessing the form/survey from a forwarded email invitation (or via direct URL) will be denied access.
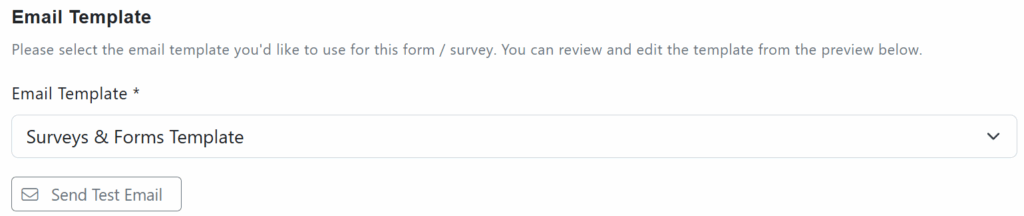
Email Template
This option allows you to choose the previously configured Email Template you want to send to the target users to inform them about the form / survey (check the documentation related to mail templates).
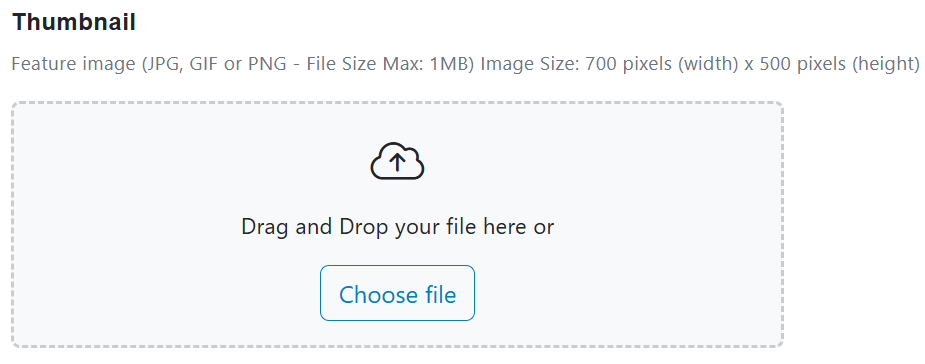
Thumbnail
Upload a thumbnail to provide an identity to the form/survey. It is important to consider the image size. Use the drag-and-drop functionality or do it using the “Choose file” button.
Once you have completed all the information, click on the save button.
Three new tabs will be enabled: Audience, Target Nodes, and Fields.

Pestaña Audiencia
This option allows you to select the users or user groups to whom the survey/form will be sent.
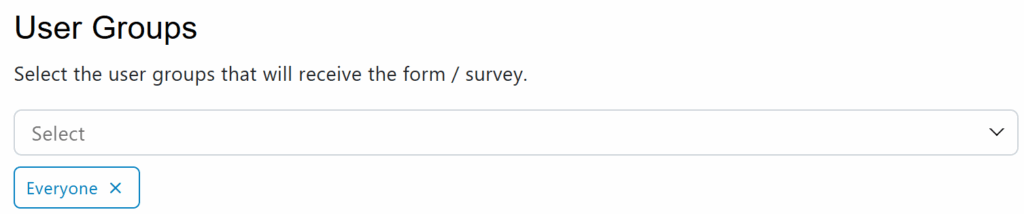
You can add one or more user groups available in the drop-down list. You can also remove groups by clicking on the [ x ] button (groups should have been created before, check the Users Groups documentation).
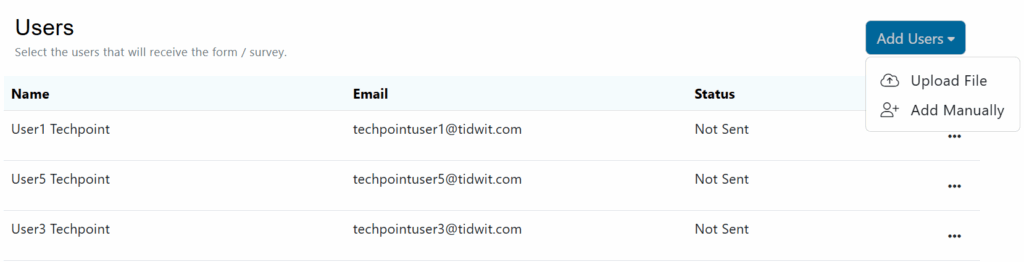
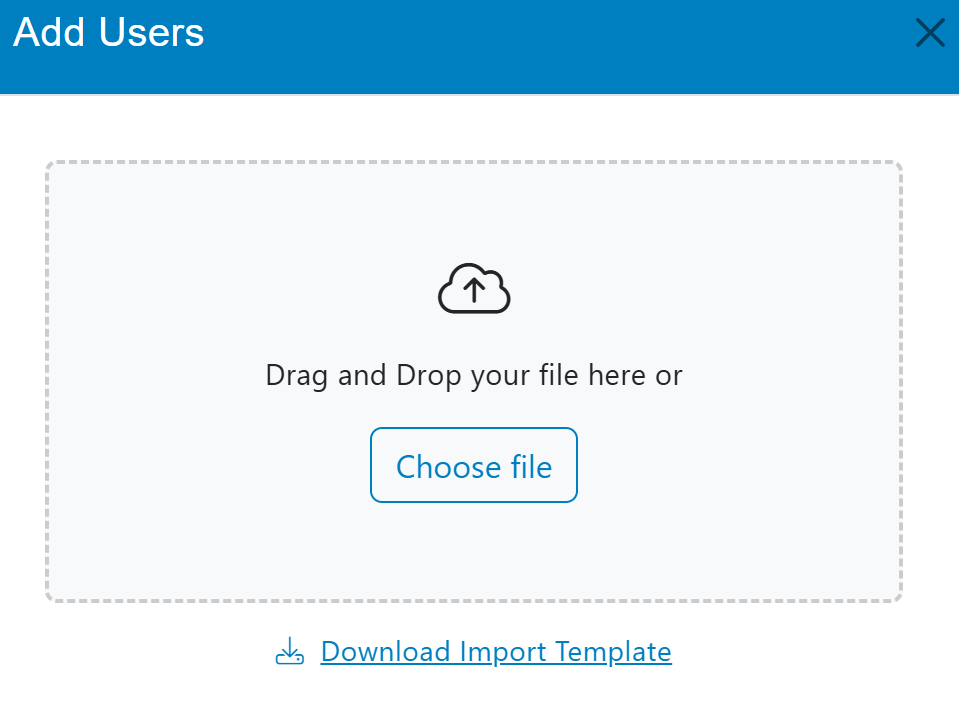
You can also add users manually or easily import an Excel file with the information.
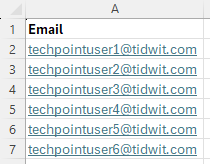
Please note that the tidwit platform always provides you the import template.To get it, click on the “Download import template” link.
Target Nodes Tab
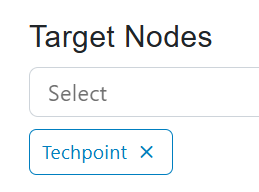
It allows you to select the underlying nodes to which the form/survey will be submitted.

You can add one or more subnodes and remove them by clicking on the “x“.
Fields Tab
In this interface, you can create as many sections and fields as you need to be displayed in the form/survey.
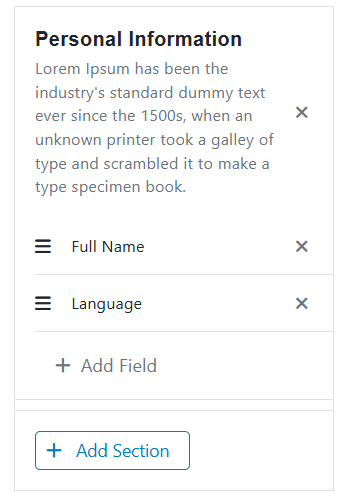
You can elaborate the form with structured data (names, last names, address, date, etc.) in the corresponding sections, to be saved and processed later by the assigned users.
There’ll be different types of fields available:
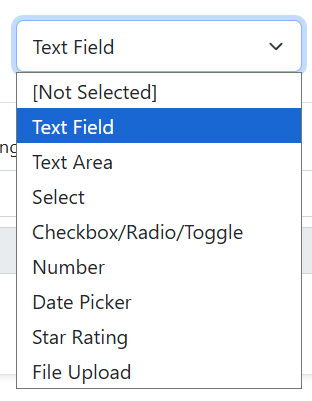
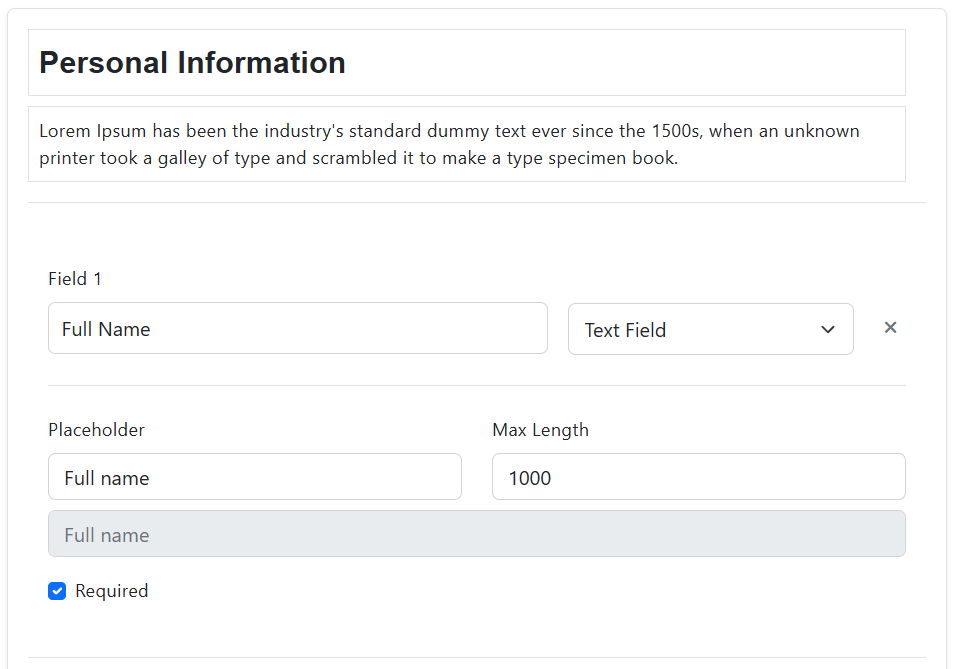
- Text Field Allows you to enter alphanumeric characters and punctuation marks. You can customize the field name, the field placeholder, the maximum and minimum number of characters and set if it is required.
- Text Area is a form element that allows the user to type text on multiple lines and can contain, by default, an unlimited number of characters. You can customize the field name, placeholder, maximum length, numbers of rows and set if it is required.
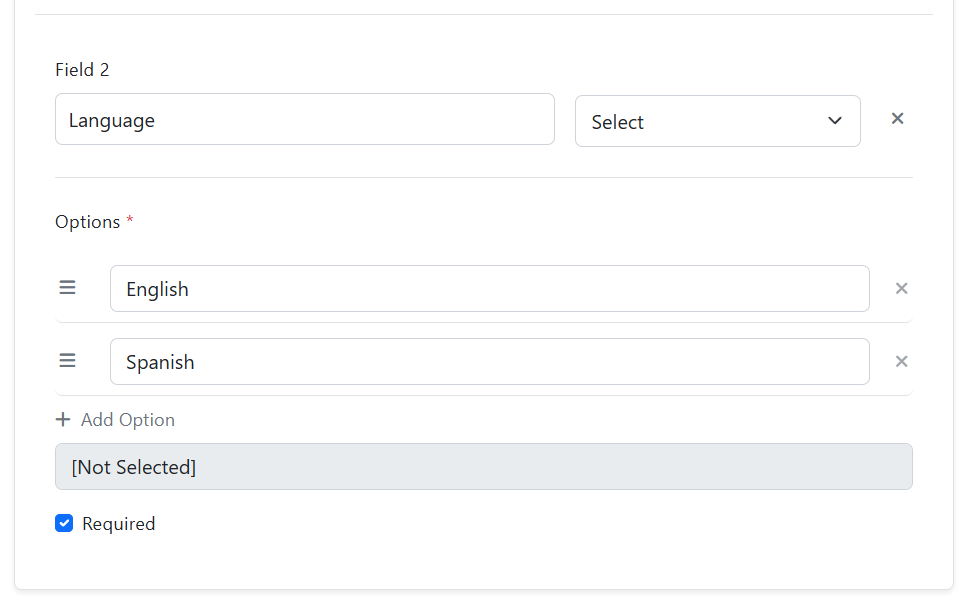
- La columna Select fields allows the users to choose one of the multiple options available in the list. You can customize the name, the group of options and set if it is required.
- La columna Checkbox allows the users to select one or more options from a group. Generally, you should show each checkbox option in a vertical list. You can customize the type, name, placeholder, the group of options and set if it is required.
- Number field allows you to enter characters from 1 to 9 plus commas. You can customize the field name, field placeholder, field maximum and minimum number of digits and set if it is required.
- La columna Date Picker type field allows us to select a specific date and time. Clicking on the field will open a calendar where you can easily select the date, below you can select the time. You can customize the field name and set if it is required. This type of field cannot be filled in manually.
- Star Rating is a type of rating question that allows users to evaluate attributes on a 5-point scale represented by stars. You can customize the field name and set if it is required.
- File Upload allowsthe users to share files on your web site in a very simple way. You can customize the field name and set if it is required.
Once you have finished setting up the fields in the form/survey, click on the save button; a confirmation message will appear at the top.

Now you are ready to publish it. Click on the “Iniciar” button at the bottom right next to the Save button..

A pop-up window will appear asking for your confirmation to proceed.
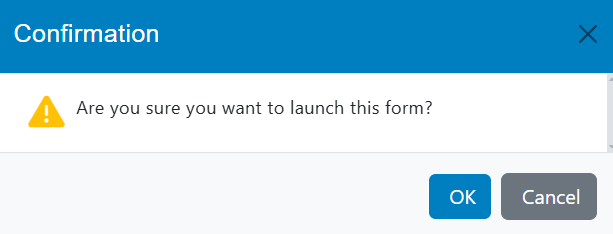
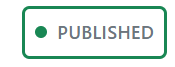
When you click “OK,” the status of the form/survey will change from “Draft” to “Published“, and you will be able to find it on the main page.
La columna Form / Survey will now be activated, and the email blast will be sent according to the defined start date and email template.