Inicia sesión en tu instancia del ecosistema TIDWIT:


En la esquina superior izquierda, haz clic en el botón de Menú. El panel lateral izquierdo se mostrará, y verás iconos correspondientes a las diferentes aplicaciones y cargas de trabajo disponibles en TIDWIT. Los tres primeros iconos corresponden a la sección de Usuarios, la cual se explica en el Manual del Usuario. Los iconos restantes solo son visibles con un perfil de administrador. Si no puedes verlos y eres un administrador, pídele al administrador del portal TIDWIT que te otorgue los permisos necesarios.
Events and Webinars Main Page
To go to main page, place the mouse pointer over the Event and Webinars icon, click it and you will be redirected inmediately. The first thing you will see is a list of all the created Event and Webinars to date and some of its properties.

Create a new Event
To create a new event, click on [ + ] plus button on the upper right corner of the screen then click on New Event. A new window will be shown.
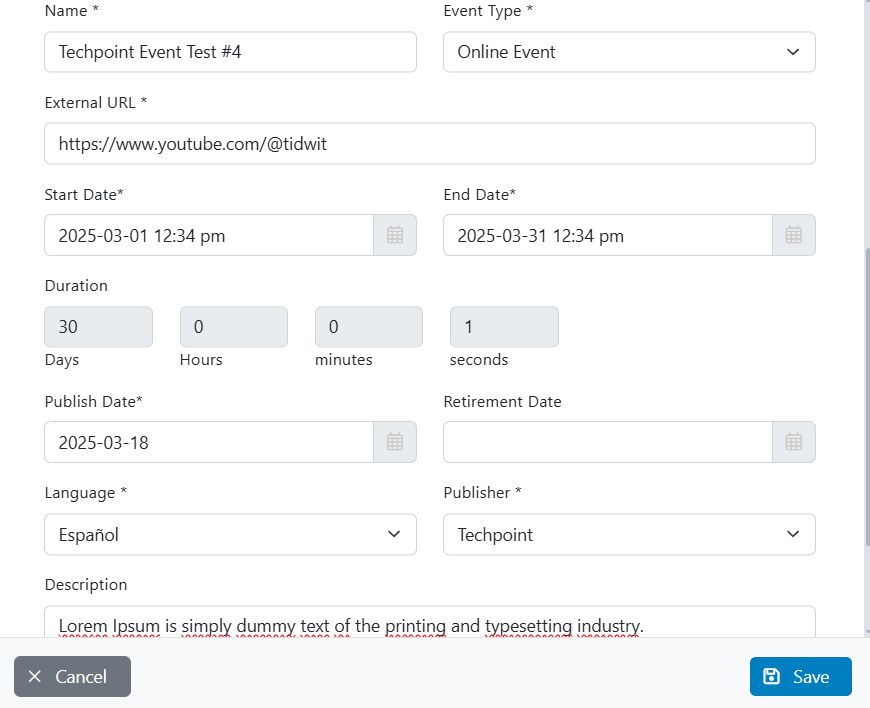
Completa la información requerida.
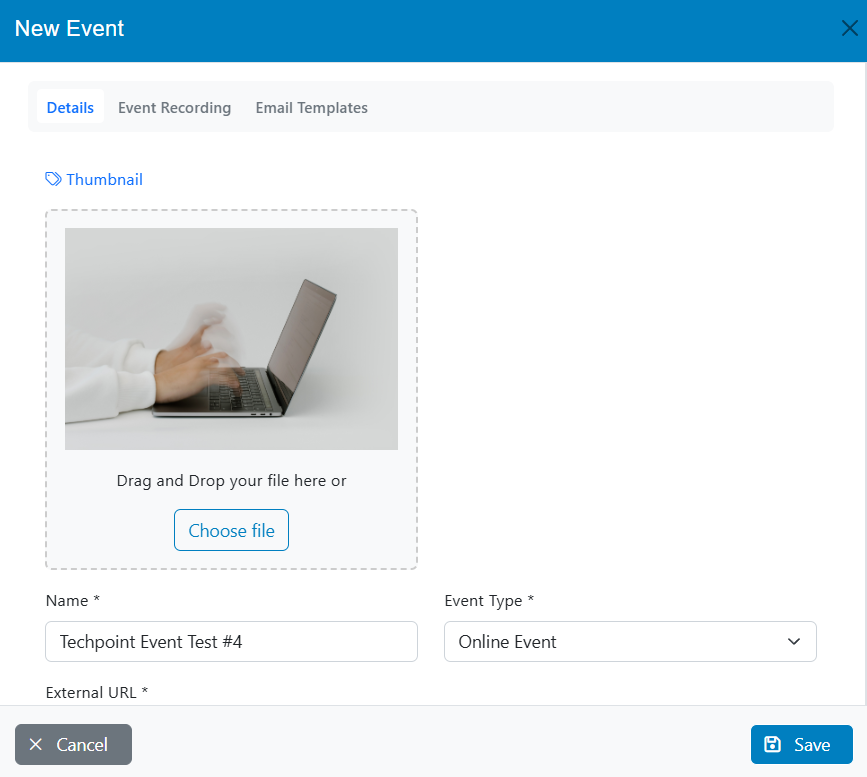
- Write the Nombre of the event
- Event Type, there are two types of events you can choose from the drop-down menu:
- Online Event allows you to add the external URL to be used to stream the online event
- Webinar allows you to add the external URL to be used and pre-select the conferencing system (Must have been previously created)
- External URL is the online transmission access link
- Set the Fecha de Inicio to define when the event will start
- Set the Fecha de Finalización to define when the event will finish
- Publish Date specifies when the event was officially released
- Retirement Date specifies when the event will be officially removed
- Select the event’s main Language
- From the drop-down menu select the Publisher
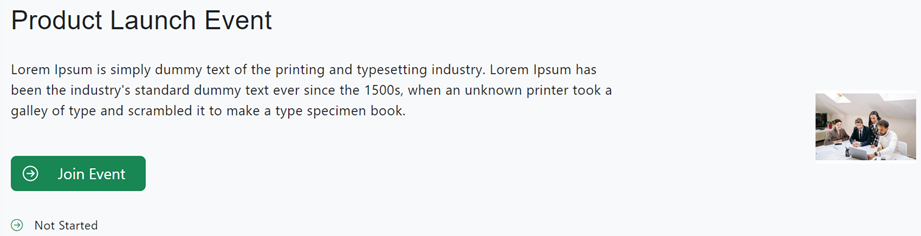
- Write a Description for the event, this field is optional
- Upload a Thumbnail, this field is optional
The description and thumbnail will appear in the event’s main page, in parallel with the button that users can use to join/register to the event.
Haga clic en el botón Guardar.
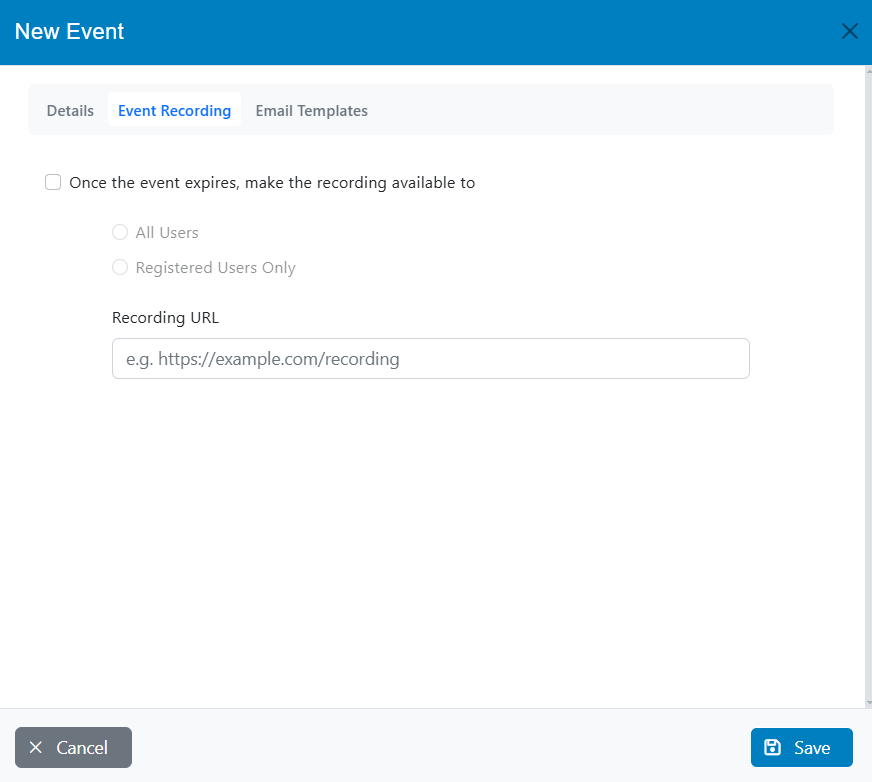
Event Recording
Haga clic en la opción Event Recording tab The live event recording process is performed by providing the URL of the recorded event and selecting authorized users to access the recording.
- All Users: All users, included those who did not participate in the live event, can access the recording.
- Registered Users Only: Only users who participated in the live event can access the recording.
Plantillas de correo electrónico
Click the Plantillas de correo electrónico tab and choose which email template you want to use for the Event Registration Confirmation email, and for the Event Reminder email. These templates can be fully customized under Node Settings > Email Templates.
Nota: Users who have opted-out to receive platform emails will still be able to access the event via the platform notification center and/or under Mis Actividades and/or via the Event URL.

Click on the save button and then on the publish button.
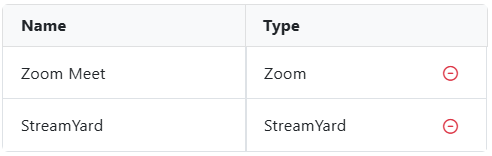
Create a new Conferencing System
Click on [ + ] plus button on the upper right corner of the screen then click on Conferencing Systems. A new window will be shown.
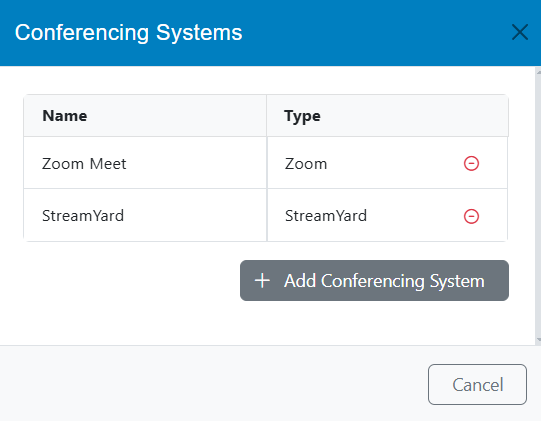
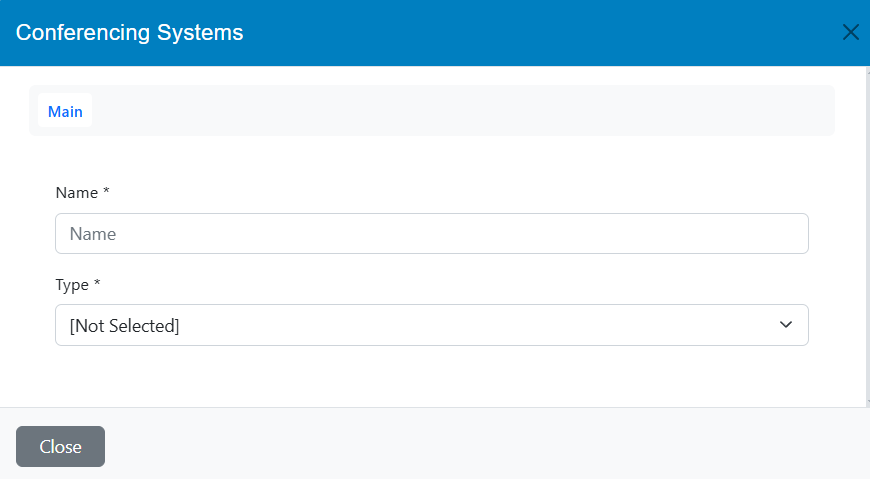
Haga clic en la opción Add button and fill in the required information.
You can choose between two types of conferencing systems integrated with TIDWIT, which are: StreamYard e Zoom.
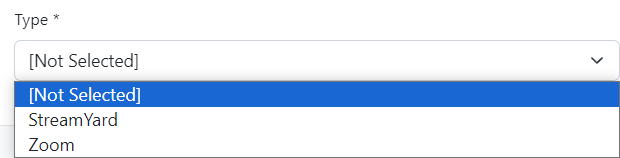
Stream Yard is a video platform that allows creating, distributing and analyzing audio visual content. It offers tools to create, share and measure the performance of such content.
Zoom is an online communication platform that offers videoconferencing, virtual meetings, chat and real-time collaboration services. Allows you to organize meetings, virtual courses, webinars and other activities.
Click on the save button and close the wizard. The new conferencing system will be created right away.