The Omnichannel Conversations module is a centralized hub for managing all user interactions across various channels. It provides agents with the tools to view, assign, respond to, and report on conversations, ensuring a seamless and efficient support and engagement experience.
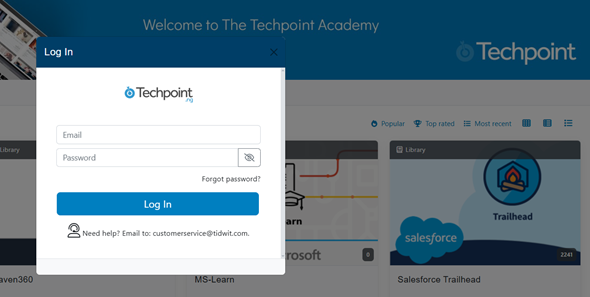
Sing-in to your TIDWIT ecosystem instance:
In the upper left corner click on the Menu button. The left-hand side panel will display, and you will see icons corresponding to the different apps and workloads available on TIDWIT. The first three icons correspond to the Users section which is explained in the User Manual. The remaining icons are only visible with an administrator profile. If you can’t see them and you are an administrator, ask your TIDWIT portal administrator to give you the required permissions.
Omnichannel Conversations Main Page
The Omnichannel Conversations allows administrators and support agents to manage all user interactions within the platform. Through this interface, users can view, filter, and manage conversations handled by AI, manual agents, or moderated modes.
To go to main page, place the mouse pointer over the Omnichannel Conversations icon, then click on the Manage Conversations option and you will be redirected inmediately.
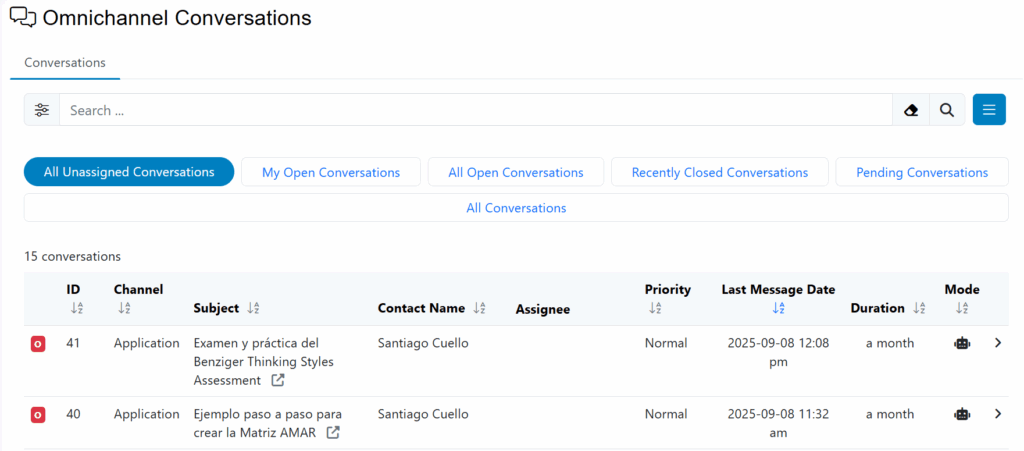
The first thing you will see is a list of All Unassigned Conversations created to date and some of its properties.
When you access the module, the primary navigation menu on the left provides access to four core areas:
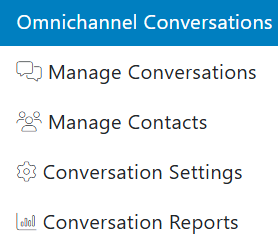
- Manage Conversations: Main panel to access and manage all active and queued conversations..
- Manage Contacts: This section allows you to overview and manage the contact information from the users who interact through the omnichannel.
- Conversation Settings: Allows administrators to manage the customer engagement hub integrations, chanels, custom fields, etc.
- Conversation Reports: Provides analytics and reports on conversation metrics and agent performance.
Manage Conversations
This is the primary interface for day-to-day conversation management, the dashboard allows agents to filter the conversation list using several predefined views:
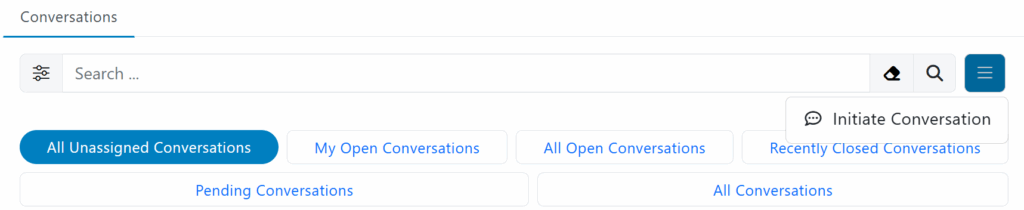
- All Unassigned Conversations – Shows new conversations that have not yet been assigned to an agent.
- My Open Conversations – Displays ongoing conversations assigned to the current user.
- All Open Conversations – Lists all active conversations across agents.
- Recently Closed Conversations – Provides access to conversations that were recently completed.
- Pending Conversations – Includes conversations awaiting action or follow-up.
- All Conversations – Displays the complete list of all conversations within the system.
Users can also initiate a new outbound conversation by clicking the Initiate Conversation button.
Through each conversation, users can:
- Review the full message history between the agent (AI or human) and the user.
- Assign an agent, change conversation mode (AI, Manual, or Moderated), and adjust priority.
- Edit the conversation title, delete the conversation, or undock it for separate viewing.
- Use the submission options (Submit as New, Open, Pending, or Closed) to update the conversation’s status.
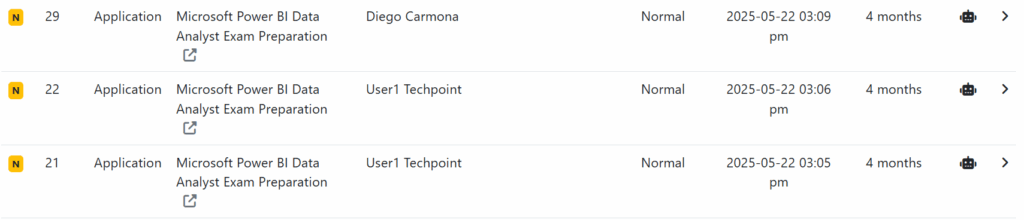
Conversation table
After selecting a filter, the dashboard displays a list of relevant conversations, organized into sortable columns.
The columns provide the following information:
- ID: The unique identification number for the conversation
- Channel: The source of the conversation (e.g., Application, Web Chat)
- Subject: The title or topic of the conversation
- Contact Name: The name of the user who initiated the conversation
- Assignee: The agent currently assigned to the conversation
- Priority: Relevance level in relation to the topic of the conversation (Low, Normal, High)
- Last Message Date: The date and time of the most recent message
- Duration: The total time the conversation has been open
- Mode: The handling mode, such as AI-assisted, moderated or manual
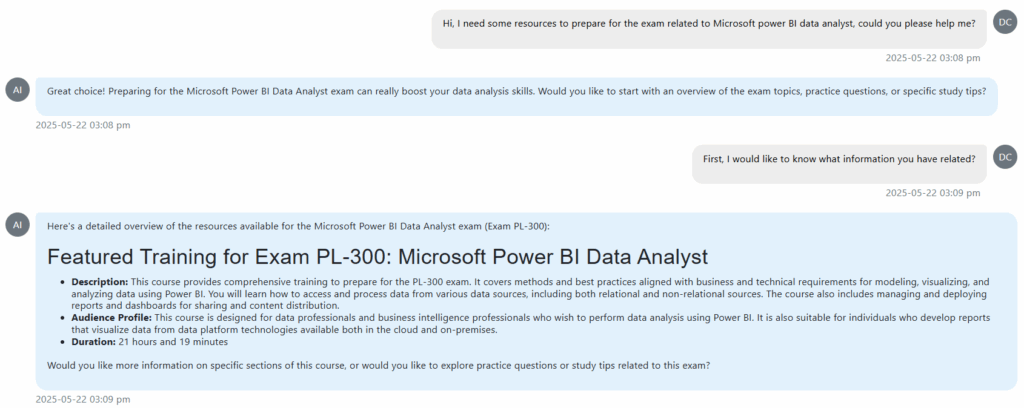
Conversation Interface
This section contains the full message history and all necessary agent controls.

Key elements include:
- Header: Displays the conversation status (e.g., Open, New…), subject, and the last message date
- Agent Controls: Allows agents to manage the assignment and state of the conversation. An unassigned agent can click Take it to claim the conversation. Agents can also set the Mode (e.g., AI, Moderated …) and Priority (e.g., Low, Normal…) from dropdown menus
- Message Center: The central area displays the messages exchanged between the user and the agent.
Response area:
Agents use the response area at the bottom of the screen to communicate with the user.
- Type the response in the text entry field. A microphone icon may be available to send a voice message
- Click the main Submit button to send the message.
- Alternatively, click the dropdown arrow next to the submit button to send the message and simultaneously update the conversation’s status to New, Open, Pending, or Closed.
Conversation Actions Menu
Additional actions are available in a menu at the top-right of the conversation view.
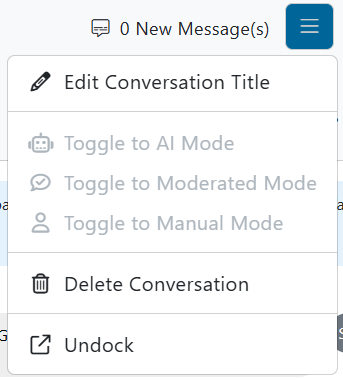
- Edit Conversation Title: Allows the agent to change the subject of the conversation for clarity
- Toggle Mode: Provides options to switch the conversation’s handling mode between AI Mode, Moderated Mode, and Manual Mode
- Delete Conversation: Permanently removes the conversation
- Undock: Opens the conversation view in a separate, floating window for easier multitasking
Manage Contacts
The Contacts section displays all customer records associated with omnichannel communications. From here, agents can view and manage customer details and interaction history.
Key features include:
- Search Bar: Quickly locate specific contacts by name, email, etc.
- Filter Tabs: Allows you to filter the table information by Last Message Date
- Contact Table:
Columns include Contact #, Contact Name, Email, Mobile #, # Conversations, and Last Message Date for tracking engagement and history.
Conversations Settings
The Omnichannel Conversations Settings section allows administrators to configure email and agent preferences for customer interactions.
Under the Emails tab, two key settings are available:
- Default Email Template:
Select the email template that will automatically be used for replying to messages. This ensures consistent formatting and tone across all agent communications. - Agent Signature:
Allows customization of each agent’s email signature, which can be automatically inserted into replies. Administrators can:- Select Agent – Choose the agent whose signature will be configured.
- Customize Signature – Use the text editor to create or format a personalized signature, including text styling, links, or images.
After completing the configuration, click Save to apply the changes.
This setup ensures consistent and professional communication throughout all omnichannel interactions.
Conversations Reports
The Conversation Reports dashboard provides a comprehensive analytical overview of the Omnichannel Conversations module. It allows administrators and managers to visualize key metrics, track agent and AI performance, and identify trends in conversation volume and efficiency over time.
Date Range Filtering
To analyze a specific period, use the date filters at the top of the page.

- Select a predefined range, such as “Year To Date,” from the first dropdown menu.
- Alternatively, specify a custom start and end date in the text field.
- Click the Go button to apply the selected date range and refresh the report data.
Content Filtering
It is possible to further customize the report data using the “Filters” section.
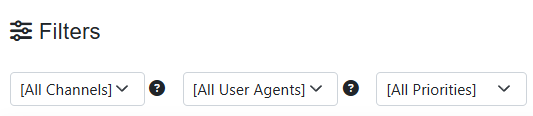
- All Channels: Filter the data to show conversations from one or more specific channels (Application, WhatsApp, Instagram, Web).
- All User Agents: Isolate data related to specific agents.
- All Priorities: View data for conversations that match selected priority levels (Low, Normal, High).
Report Sections
The dashboard has different sections that summarize statistical data from conversations.
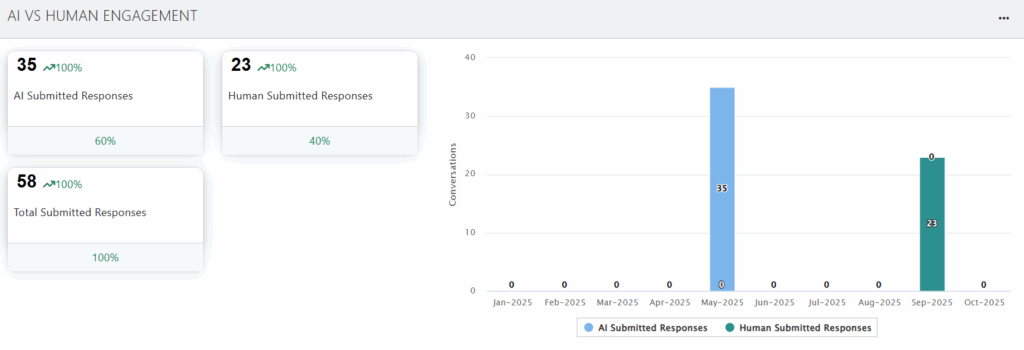
AI vs Human Engagement
This section compares the volume of responses submitted by AI versus human agents.
- KPI Cards: Display total counts for AI Submitted Responses , Human Submitted Responses , and Total Submitted Responses. Each card also shows its percentage relative to the total.
- Bar Chart: Provides a monthly breakdown of AI-submitted responses versus human-submitted responses.
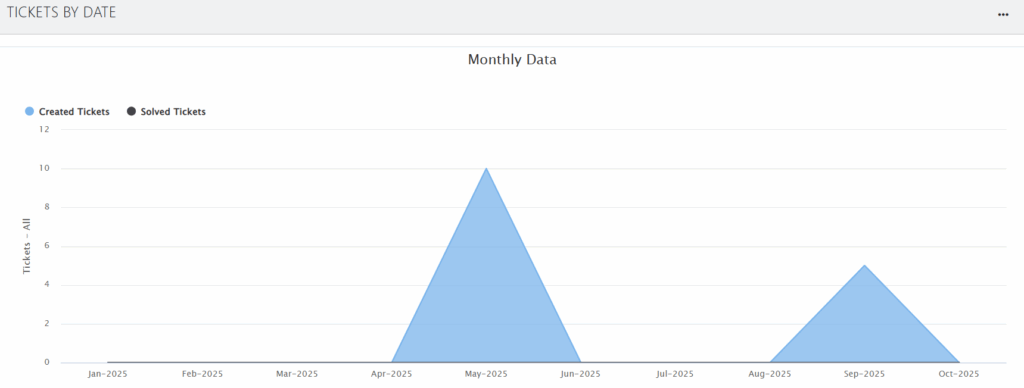
Tickets by Date
This widget tracks the number of conversations (tickets) created and solved over time.
- Monthly Data: An area chart shows the total number of Created Tickets versus Solved Tickets for each month within the selected date range.
- Channel Breakdown: Separate area charts display the monthly ticket volume for individual channels, such as Application , WhatsApp , Instagram , and Web.
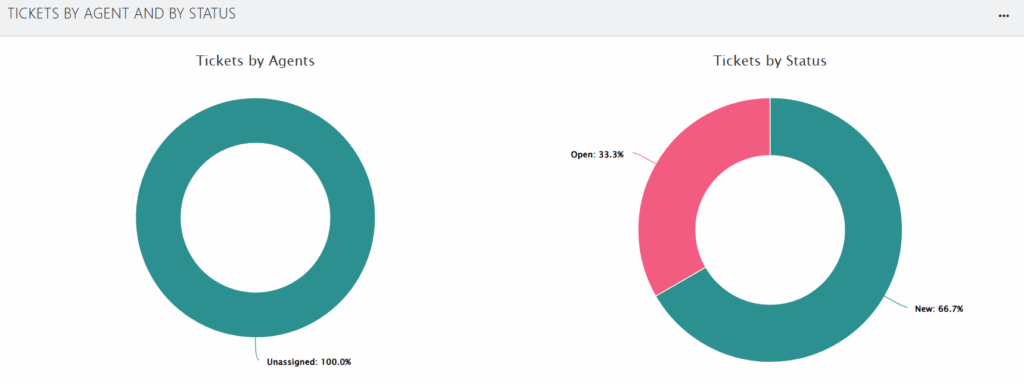
Tickets by Agent and by Status
This section provides a snapshot of the current ticket distribution.
- Tickets by Agents: A donut chart illustrates the percentage of tickets assigned to agents versus those that are
Unassigned. - Tickets by Status: A donut chart shows the proportion of tickets in each status.
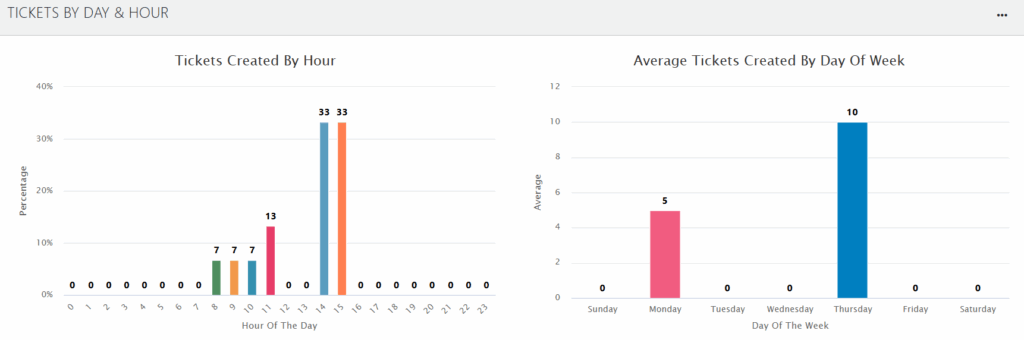
Tickets by Day & Hour
These charts identify peak times for ticket creation.
- Tickets Created By Hour: A bar chart displays the percentage of tickets created during each hour of the day.
- Average Tickets Created By Day Of Week: A bar chart shows the average number of tickets created on each day of the week.
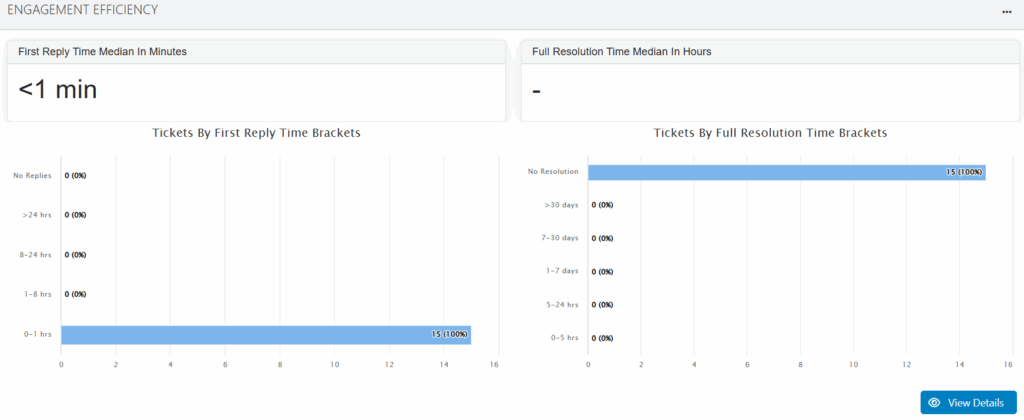
Engagement Efficiency
This widget measures the speed and effectiveness of responses and resolutions.
- Median Times: KPI cards show the First Reply Time Median in Minutes (e.g., <1 min) and the Full Resolution Time Median in Hours.
- Time Brackets: Bar charts provide a percentage breakdown of tickets based on how long they took to receive a first reply (e.g., 0-1 hrs) and to reach full resolution.
- A View Details button is available to get a more detailed view of the efficiency data.