The TIDWIT License Pools application allows content Admins to restrict library access, so that only authorized users can access the underlying content.
- Library access can be granted based on named users or based on “first come first served”.
- Eligible users will be able to open the content – whether embedded or external.
- Non-Eligible users will be denied access with a custom message/prompt.
- License pool reports offer a summary of granted and denied access
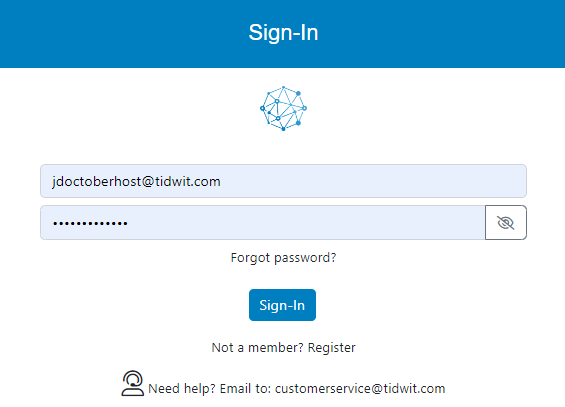
Sing-in to your TIDWIT ecosystem instance

In the upper left corner click on the Menu button. The left-hand side panel will display, and you will see icons corresponding to the different apps and workloads available on TIDWIT. The first three icons correspond to the Users section which is explained in the User Manual. The remaining icons are only visible with an administrator profile. If you can’t see them and you are an administrator, ask your TIDWIT portal administrator to give you the required permissions.
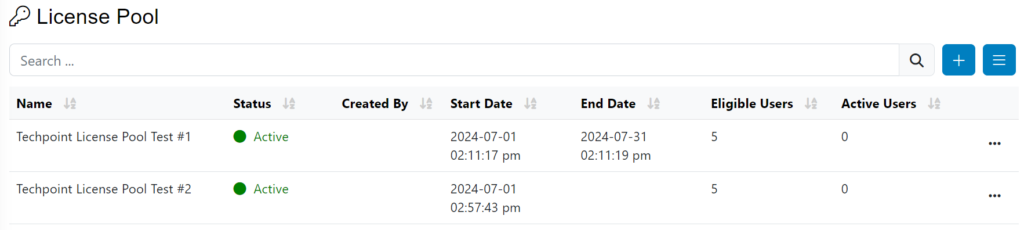
License Pools Main Page
To go to the License Pool page, place the mouse pointer over the License Pool icon, click it and you will be redirected to the License Pool main page. The first thing you will see is the list of pools created to date and some of its properties.
Creating a new License Pool
To create a new license pool, click on [ + ] plus button on the upper right corner of the screen then click on Create New License Pool. A new window will be shown.
Fill in required information.
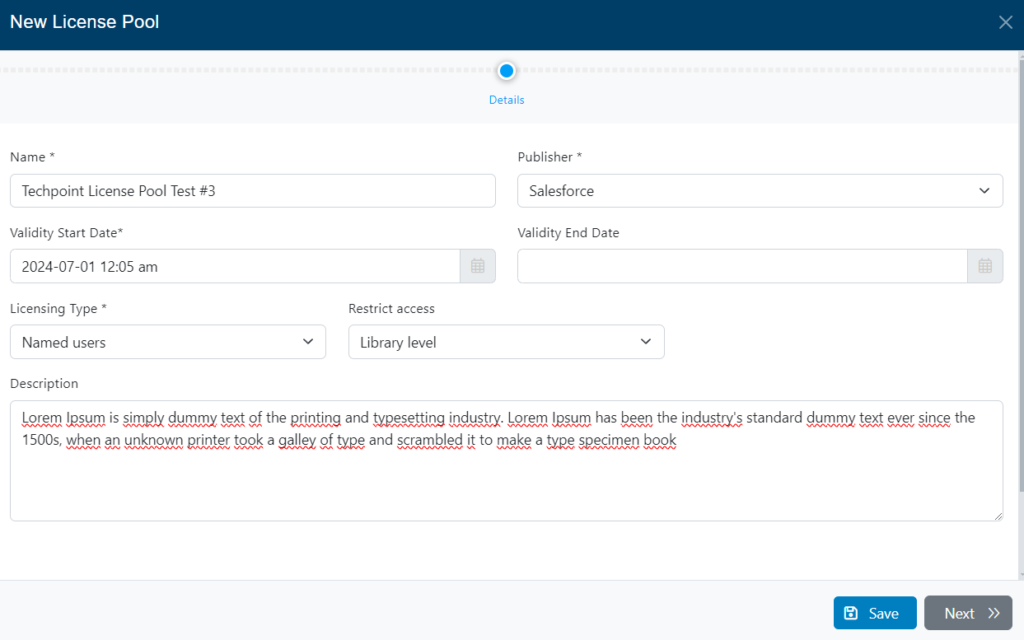
- Write the Name of the license
- Publisher, choose the publisher from the drop-down menu
- Select a Validity Start Date to define the date from which the license will be active. (When access will be granted to eligible users)
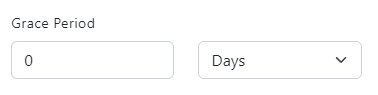
- Select a Validity End Date to define the expiration date of the license (When access will be revoked to eligible users). If you specify an end date, a new field will appear, in which you can define a “grace period” in days, weeks, months (Grace period allows eligible users to keep accessing content for a defined period beyond the validity end-date; this could be useful for example if they haven’t completed a course)
- Write a Description for the license (Optional)
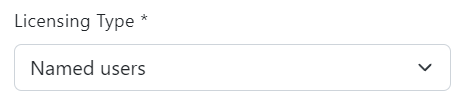
- Licensing Type, choose from the drop-down menu:
Named users: Grant access to a defined list of named users / user groups. Users who are not on the list will be denied access
First In: The first X users trying to access the content will be allowed; once the defined quota of licenses have been assigned, additional access requests will be denied

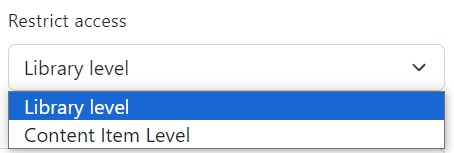
You can also define the level of restriction that the licenses pool will have, either at library level or content level.
Click the Save button and three new tabs will be available.
Eligible Users Tab
Add User Group(s) and/or individual User(s). Click <Add Users> to upload a list of users from Excel.
Only users added in this section will be able to access the license.
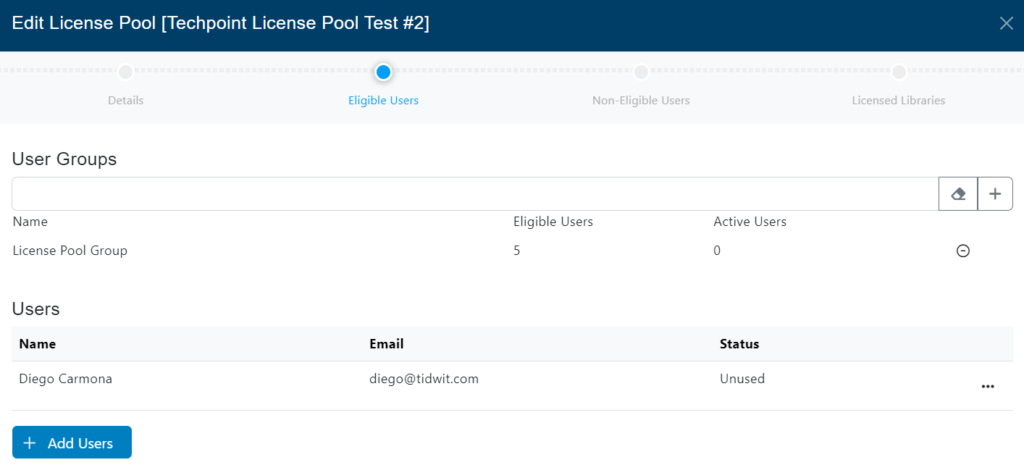
Click the Next button.
Non-Eligible Users Tab
Users who are not eligible to access the library content (no license) will be denied access and prompted with a custom message. Feel free to update the message according to your needs.
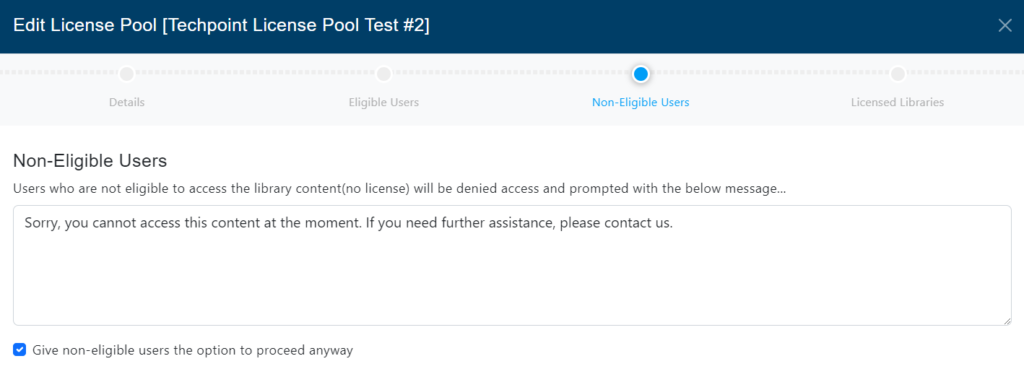
The application allows administrators to give non-eligible users the option to proceed anyway.
This option is very useful if you want to inform non-eligible users about the license restriction, but you don’t want to “block” them. Only give them a “warning” and make it possible for them to proceed / open the content anyway.
Click the Save and Next button.
Licensed Libraries Tab
Select the libraries you want to apply the license to. You can select as many libraries as you need.
Note: once you’ve added a library to the list, only eligible users will be able to access the underlying content.
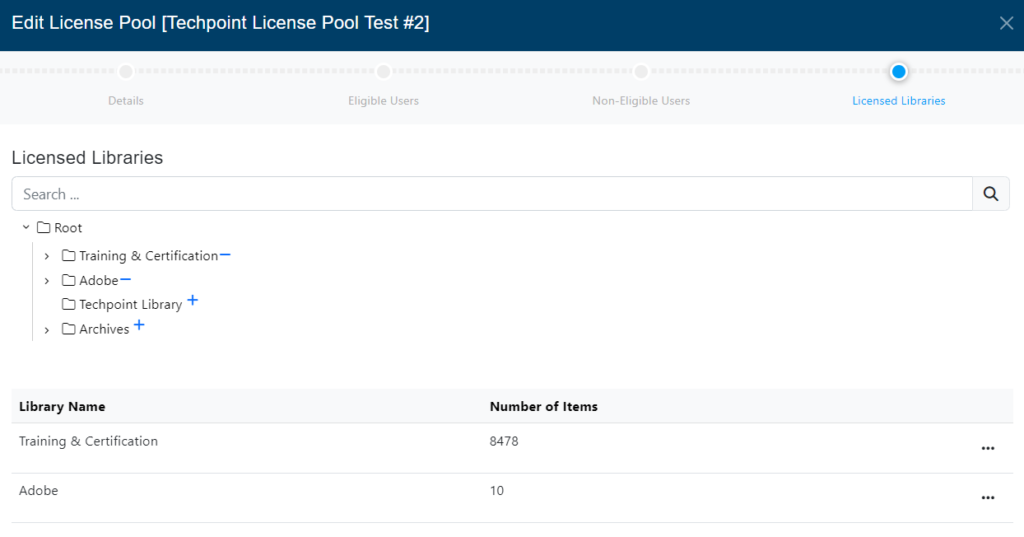
Once you have added a library, you can click the three-dots button to see additional options:
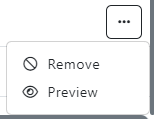
- You can Remove the license from a library if necessary.
- You can Preview the library content. (This will open a new tab without interrupting the license creation process).
Click the Close button to return to the main licensing page and the license pool you just created will be added to the list with a pending status.

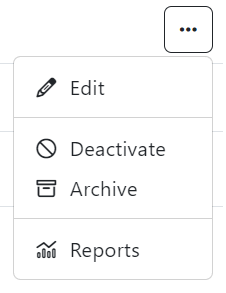
Once the license pool has been created you can manage it by accessing the three points on the right side, you will be able to Edit, Activate or Delete it.
(These options are available only if the license pool has not been activated).
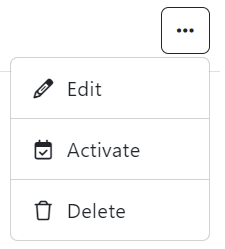
If the license pool is activated, you will be able to Edit, Deactivate, Archive & see the Reports.