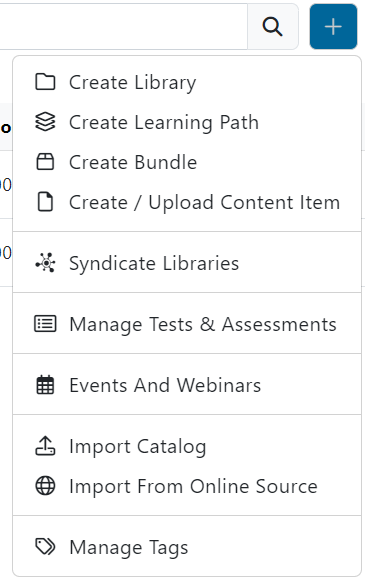
To create a new learning path from the main ECM window, click on the blue plus icon on the right side of the searching bar.
When the menu drops, click on Create Learning Path. A new window will pop up with empty fields requiring information about the new learning path that will be created.
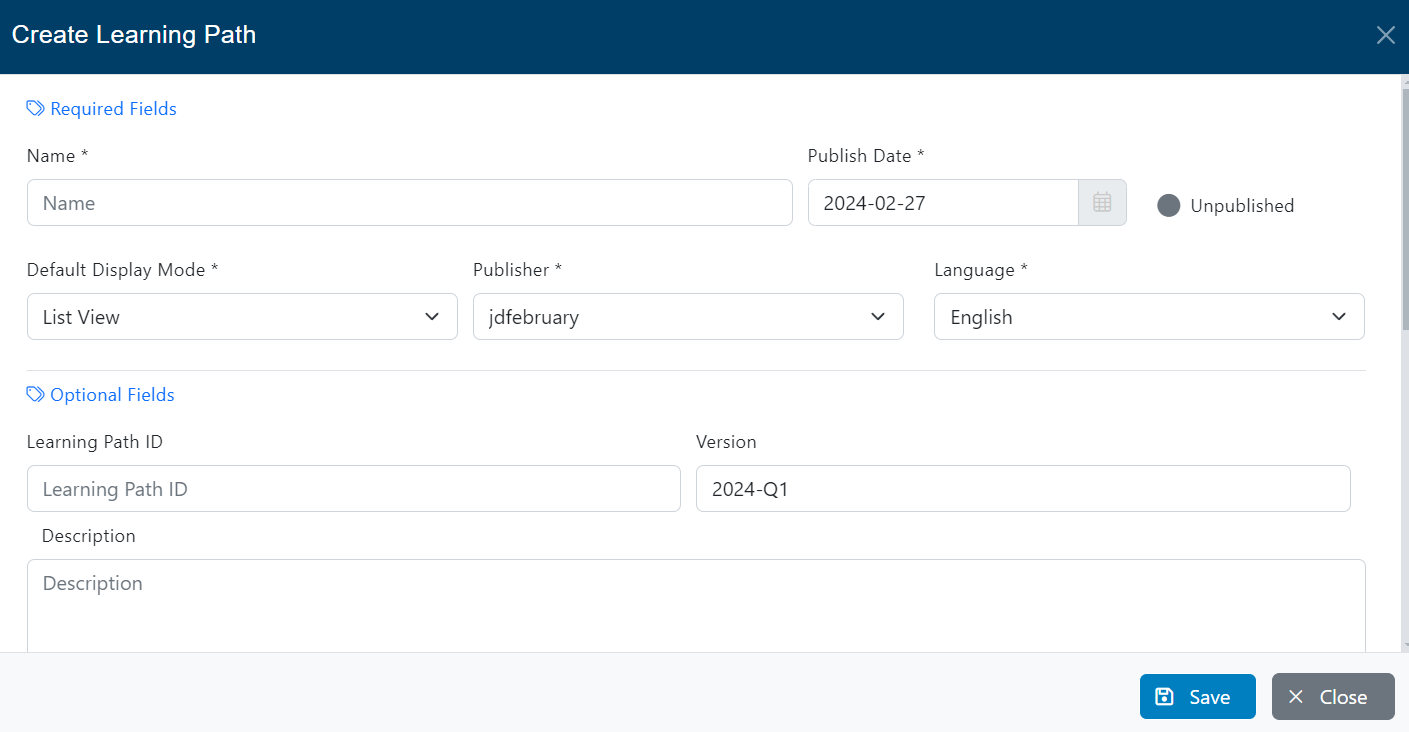
Required and optional fields
Fill all the required information like Name, Publish Date, Display Mode, Publisher, and Language. Also, you have the possibility to fill optional information like Learning Path ID, Version, and a short Description about the Learning Path, so users will know what they are going to learn.
Enable custom completion thresholds for embedded learning path videos
This option allows you to set custom completion thresholds specifically for videos embedded within a learning path. When enabled, it overrides the general node settings regarding the minimum viewing percentage required for a video to be marked as “completed” by the user.

Scroll down to the next section.
Tags Section
In this section, choose the tag values that will make the Learning Path easier to search & find by the user. The available tags must be created separatedly usin the Manage Tags functionality (see the corresponding documentation).

After selecting the tag values, scroll down to the next section.
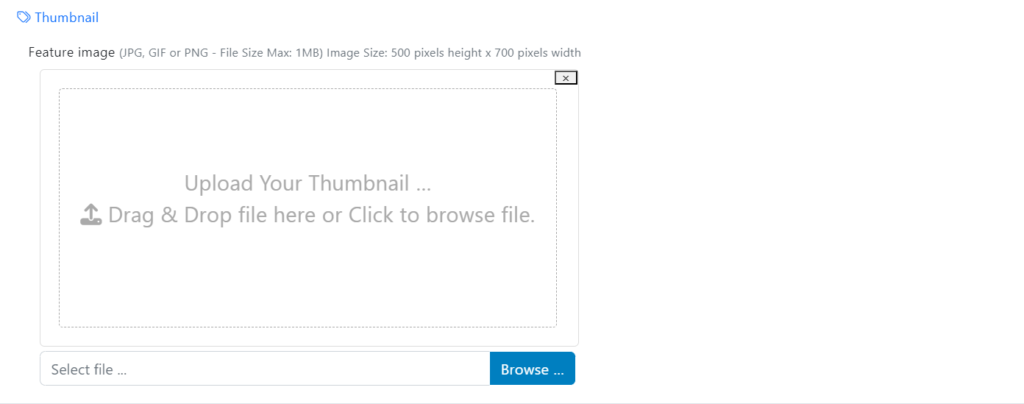
Thumbnail Section
Upload a thumbnail image for the new learning path. For best rendering, the thumbnail should be 700 x 500 pixels, the following formats are supported: (gif, png, and jpg).
Banner Section
Finally, this field allows users to upload a custom banner to visually improve the learning path..
- Supported formats: JPG, GIF, PNG
- Maximum file size: 1MB
- Recommended image dimensions: 500 x 700 pixels
Users may upload an image by either clicking the “Browse” button or by dragging and dropping a file into the designated upload area.
Once you have completed the information, click on Save and close the window.
Learning Path Expansion Pane
After you close the creation window, the new Learning Path expansion pane will be automatically opened. You will see all the Learning Path information and some action buttons.
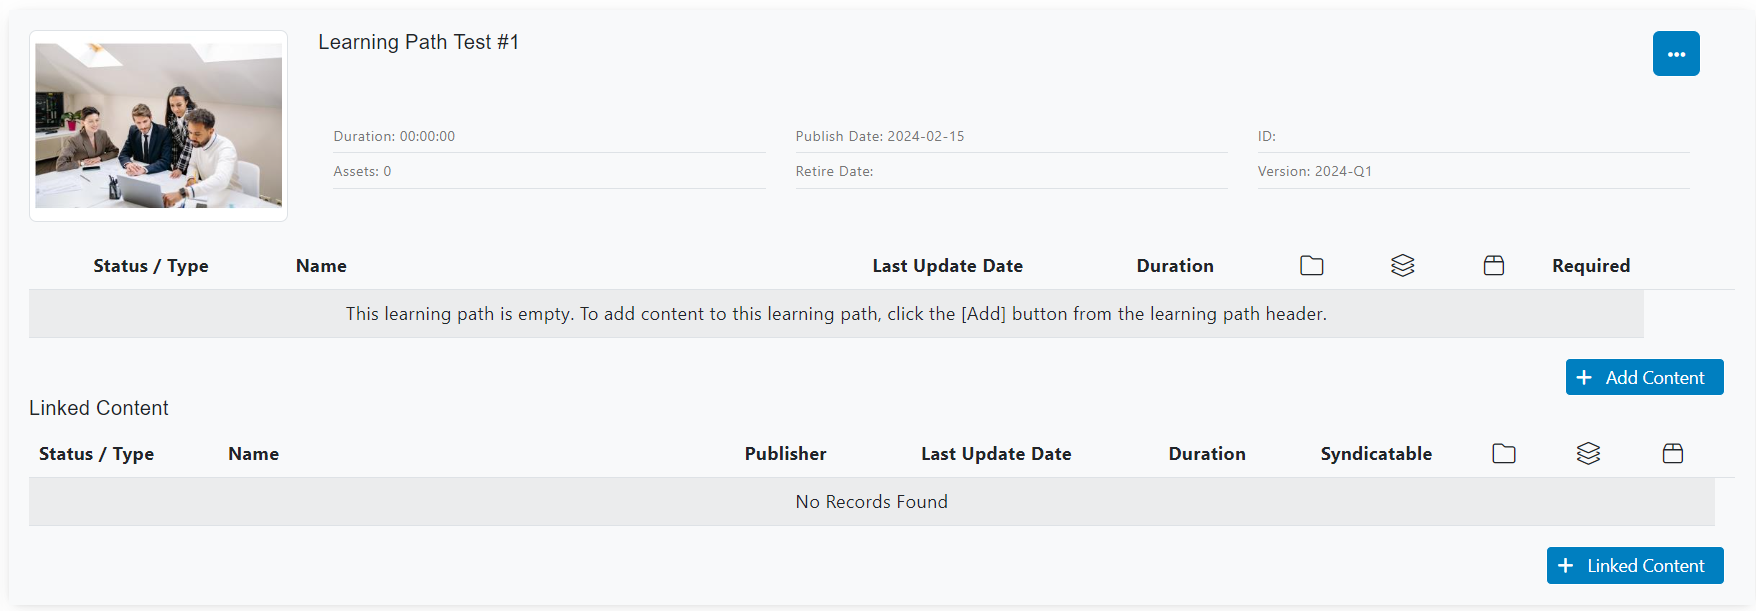
Add Content
Click on the Add Content button to start adding content to the learning path. A new window will pop up and you will see a list of available libraries that you can explore and navigate them to find assets to be added.
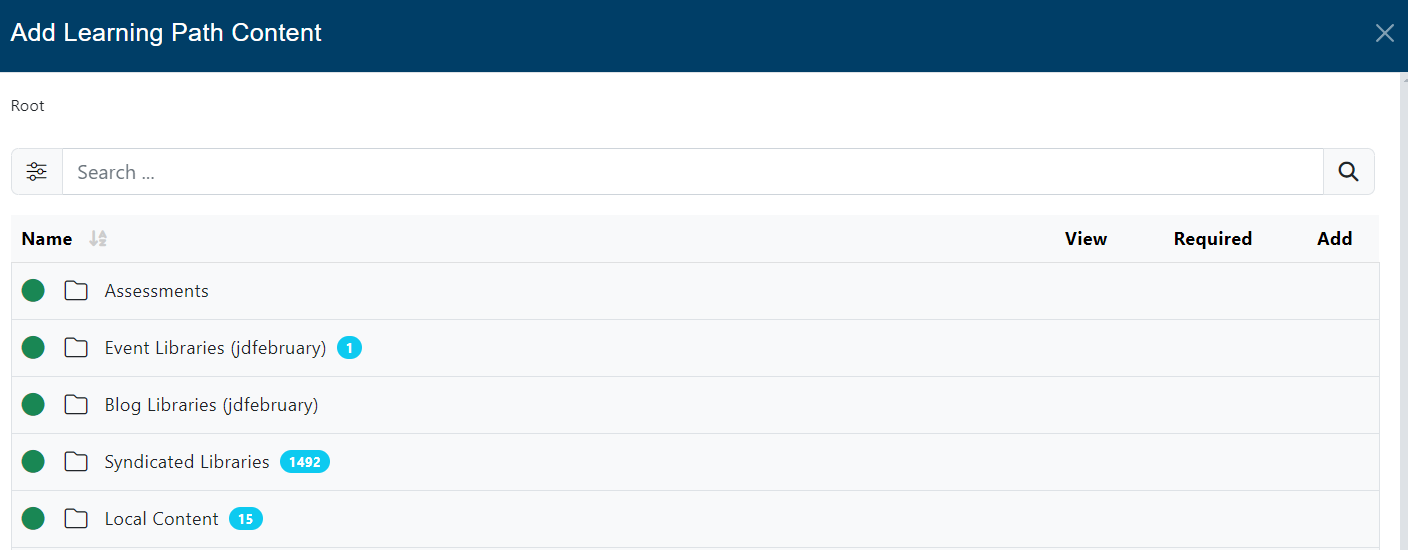
When you open a library, you will see a list of assets. If you want all the items in the list, you can click on the + Add All link. Otherwise, you can select them one by one clicking on the [ + ] plus button.
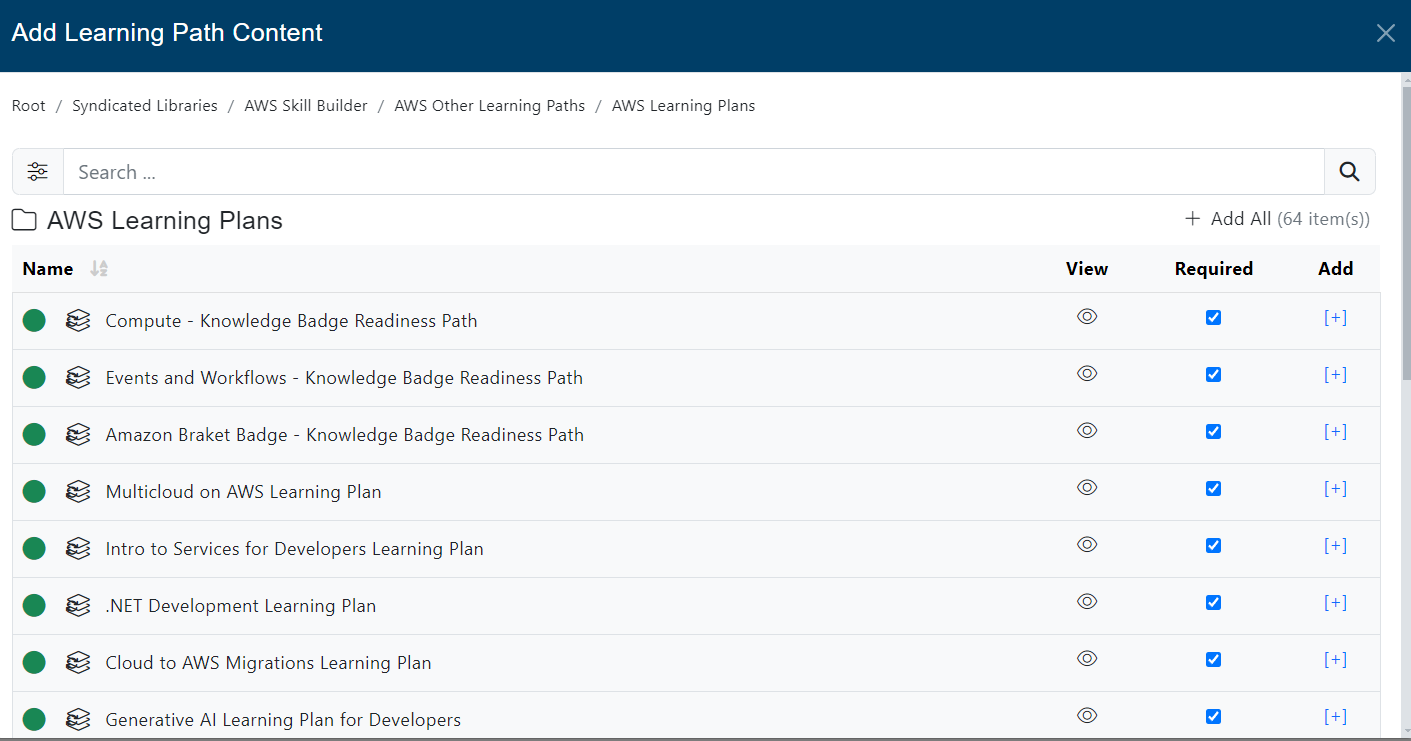
In the Add All link, you will find the number of contents available in the selected library.

You can also use the filters to search for specific content:
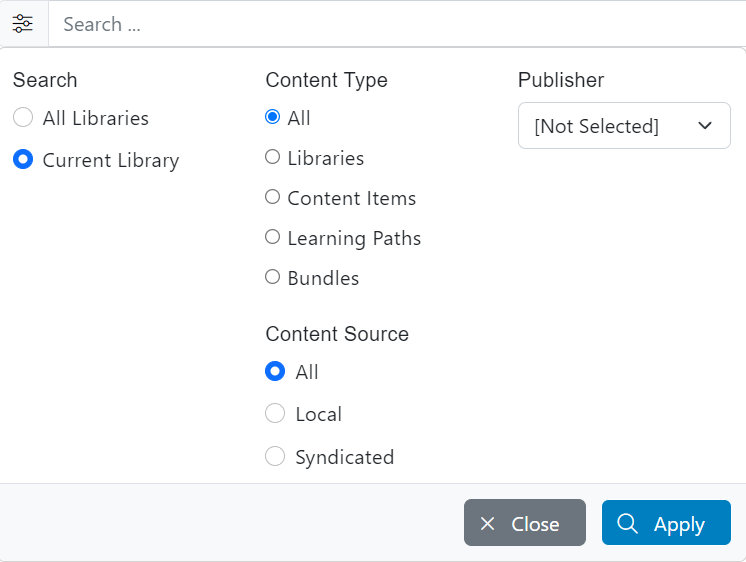
When you select the filters, click on Apply.
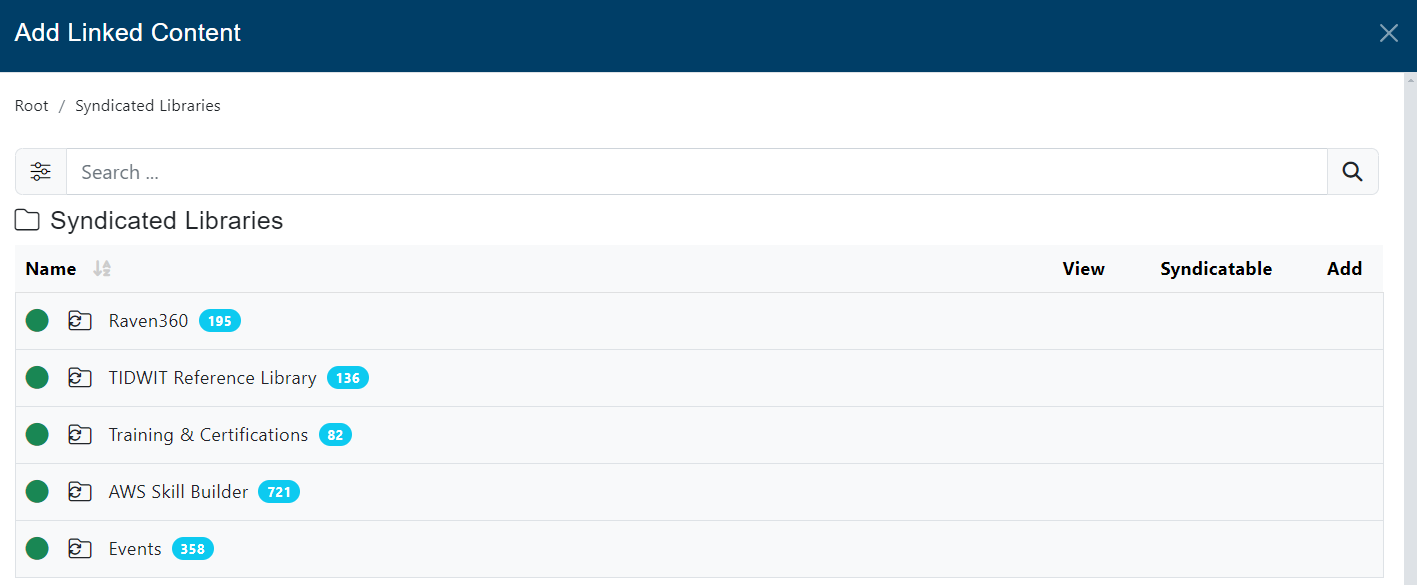
Add Linked Content
In the Linked Content section, add content that is not part of the Learning Path itself and is not required for completion but can be made available to the user as useful/complementary resources. You can add learning paths or content items (assets).
Follow the same procedure to add content to the Linked Content section.
Manage the Learning Path
Once you have added the Content and the Linked Content, Close the window and now you will see the added content in the Learning Path expansion pane. You have available the option to mark it as required, you can see the type of content and status (green for published, gray for unpublished).
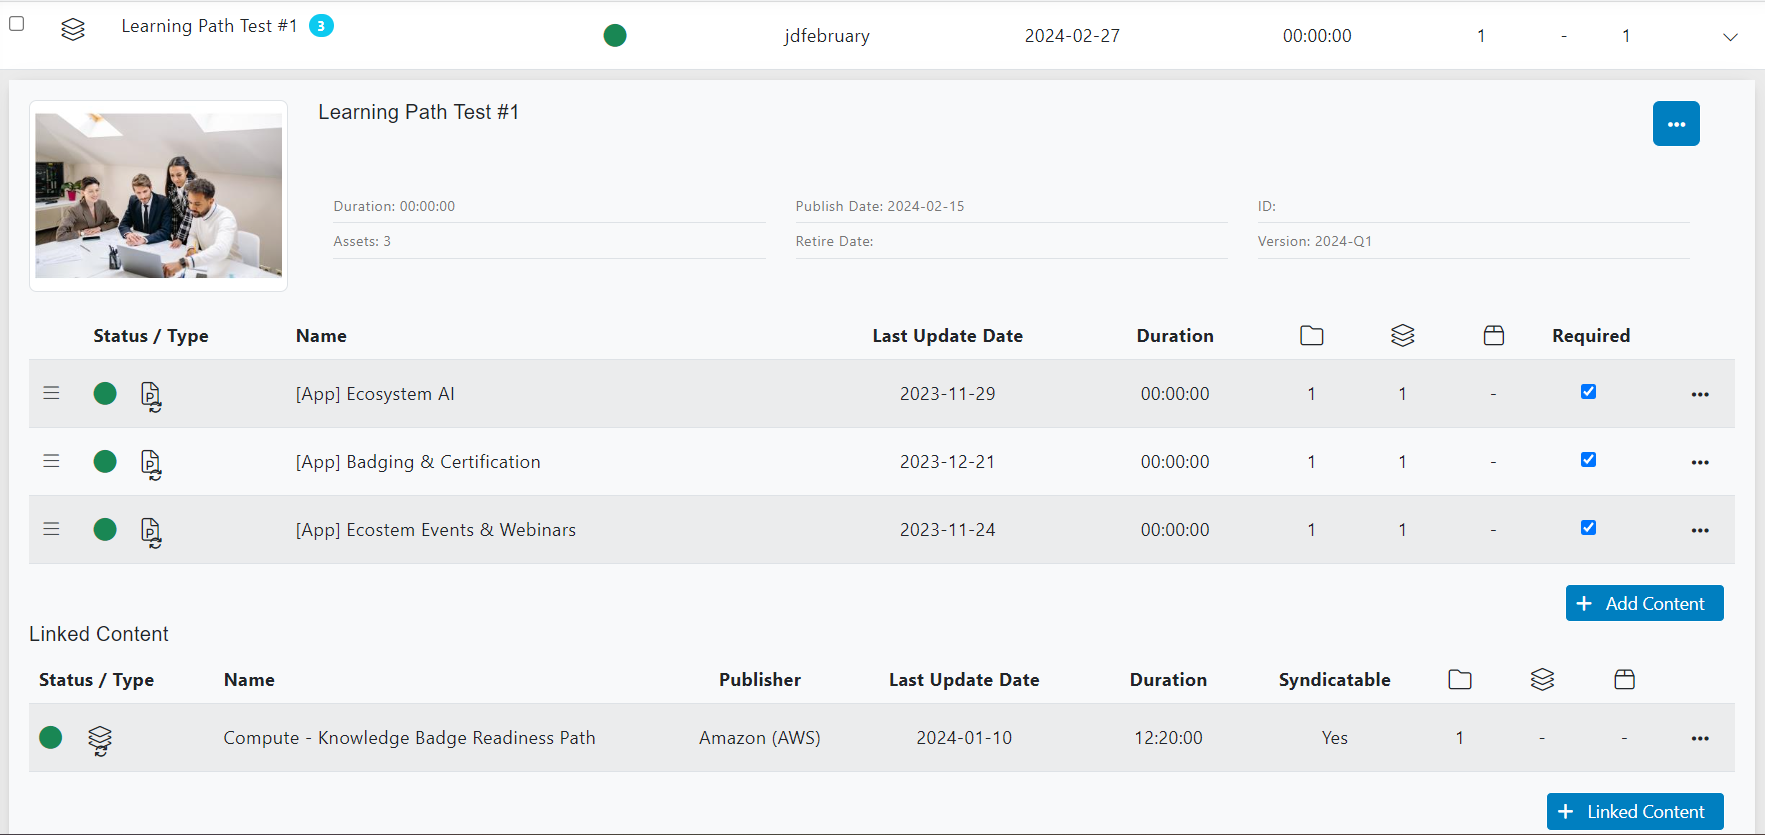
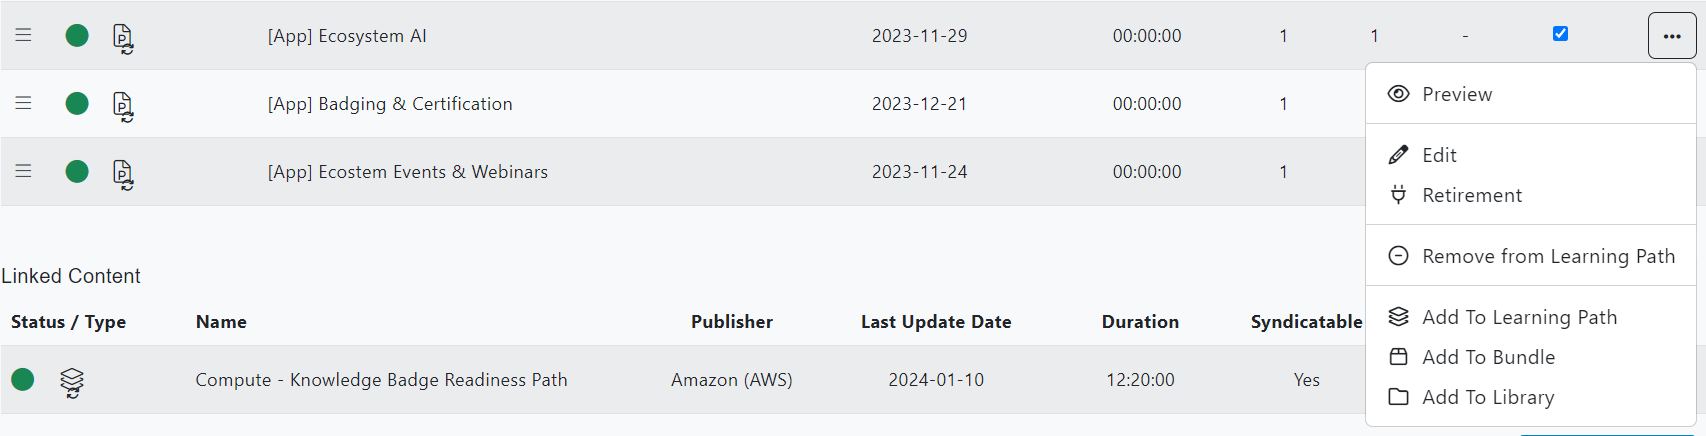
You can Preview, Edit, set a Retirement date, Remove From Learning Path, Add To Library, Add To Bundle and Add To Learning Path by clicking on the three-dots button from the Content and Linked Content.
Back to the Learning Path expansion pane, you can also click on the three dots button to see more actions:
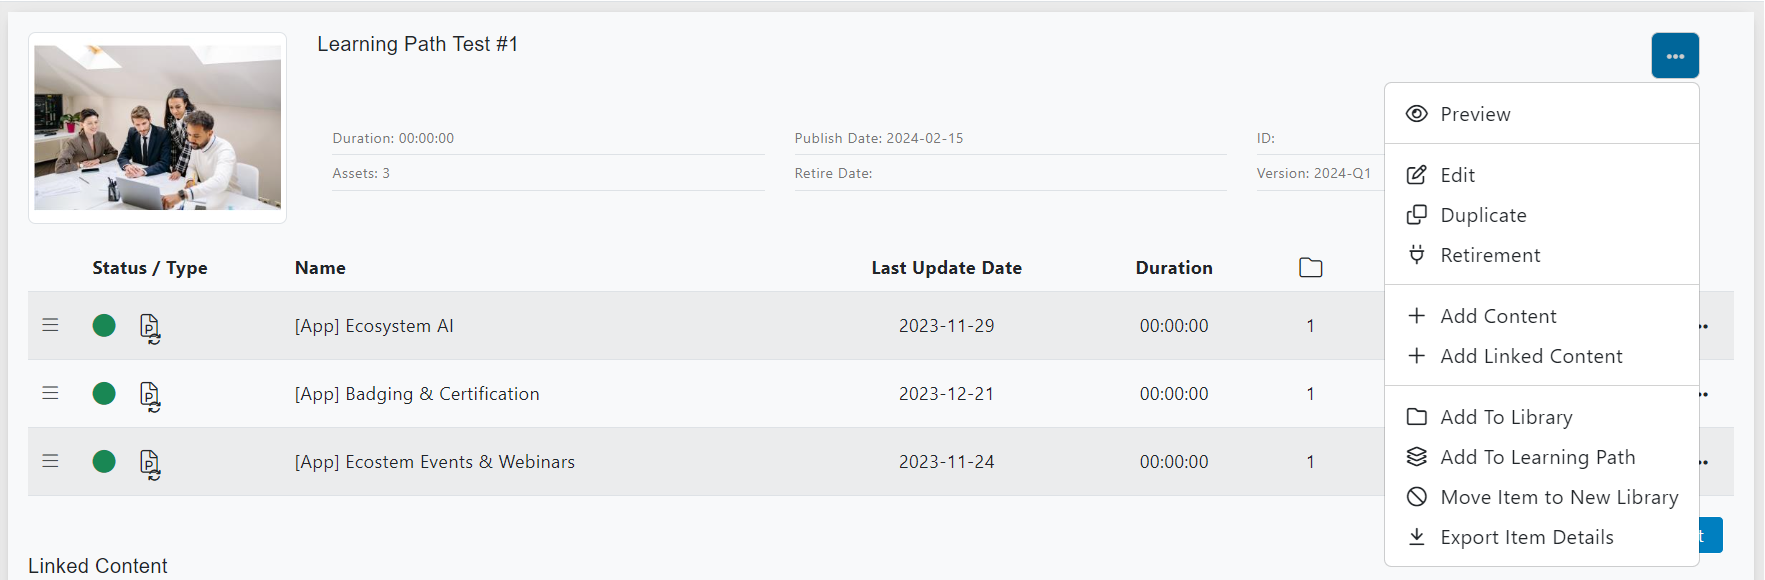
You can Preview, Edit and Duplicate the Learning Path, you can also set a Retirement Date and define if it has Replacement.
When your Content Item expires, it will no longer be visible to the users. If you have configured a replacement Content Item, the user will be automatically redirected to the newer version.
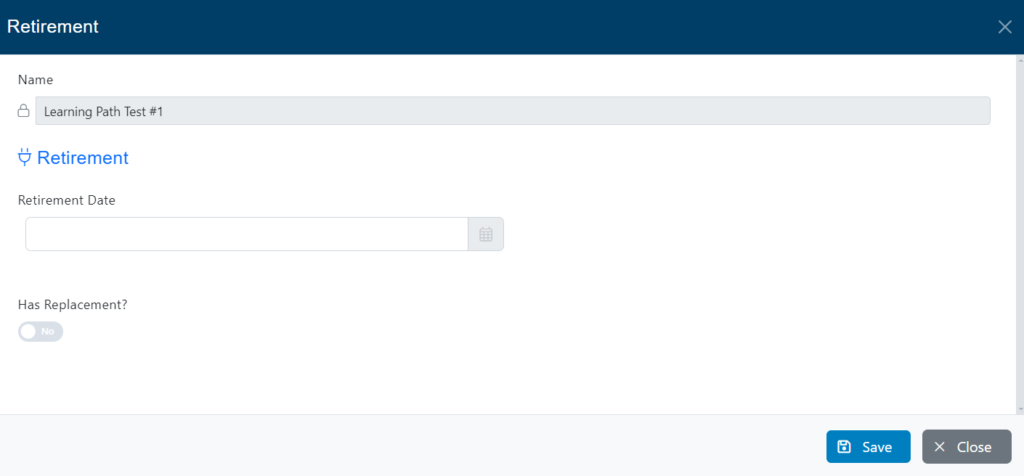
Additionally, check if the Learning Path has replacement or not. If you check Yes, select the new content that will replace it after retirement.
Click on Save to save all changes and close the window.
Add To Library
Click on Add To Library to map the learning path to a library. A new window will pop up.
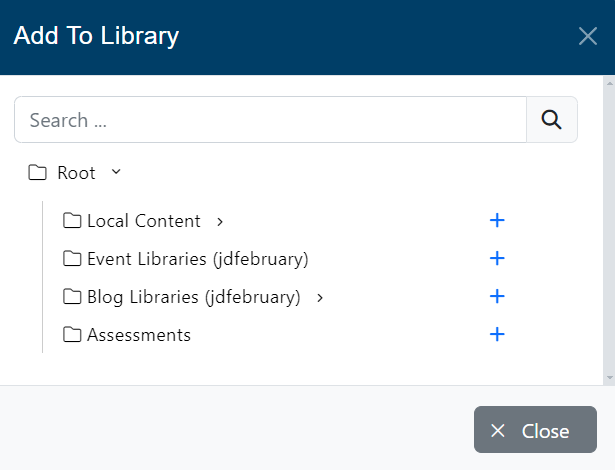
Click on the Plus button of the library in which you want to map the Learning Path, then you can close that window.
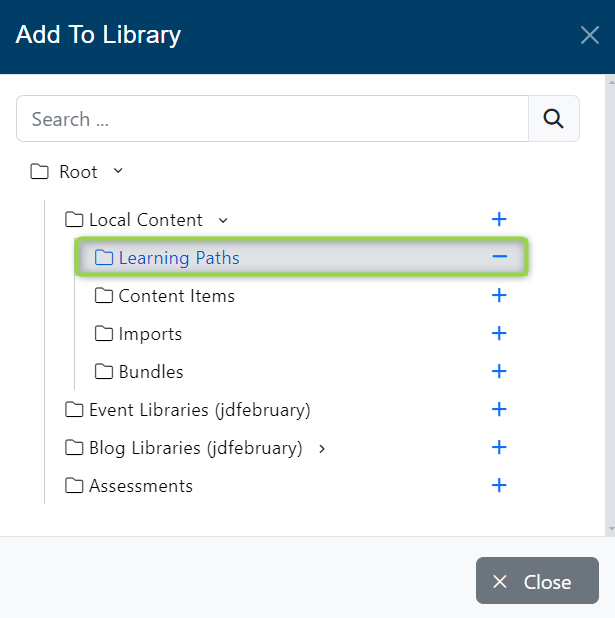
The Learning Path will now appear inside the mapped libraries.
Check the Learning Path expansion pane, you can visualize how the content is mapped to Libraries, Learning Paths, or Bundles.

You can Preview, Edit and Remove. Note: You cannot remove Syndicated Content.
Preview
The “Preview” button of the learning path in our application allows you to preview the contents before starting. By clicking this button, you will be able to access a summary of the topics to be covered in the path, as well as view samples of the educational materials and resources available.
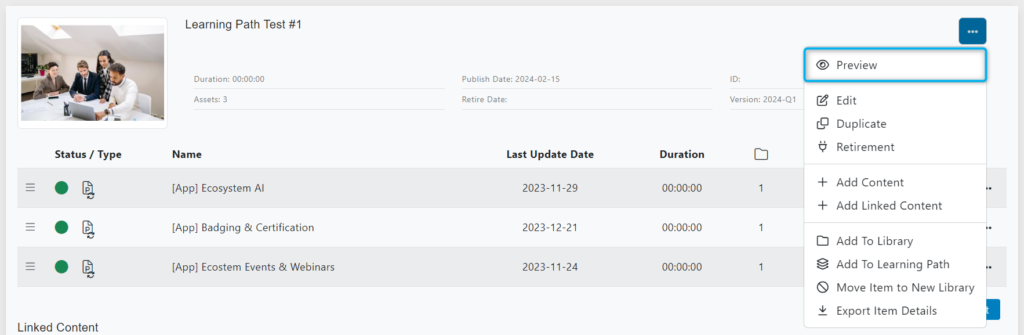
Once you have clicked on the “Preview” button, a new window will appear with the information described above.

Publish
If the learning path’s status is unpublished, click on the Publish button in the expansion pane to publish it immediately.
