Sign-in to your TIDWIT ecosystem instance:

In the upper left corner click on the Menu button. The left-hand side panel will display, and you will see icons corresponding to the different apps and workloads available on TIDWIT. The first three icons correspond to the Users section which is explained in the User Manual. The remaining icons are only visible with an administrator profile. If you can’t see them and you are an administrator, ask your TIDWIT portal administrator to give you the required permissions.
Surveys & Polls
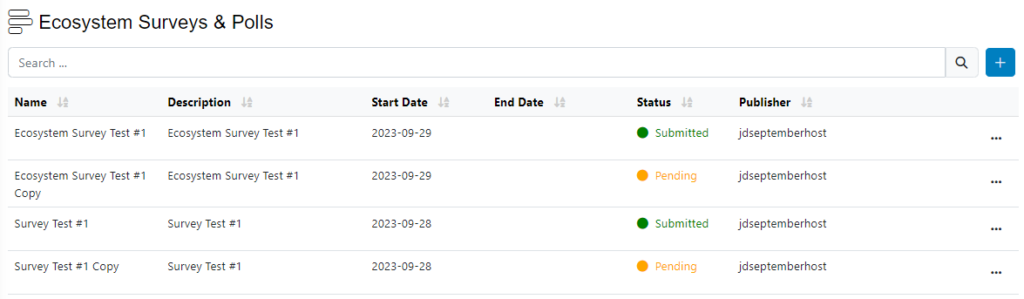
To go to the Surveys & Polls section, place the mouse pointer over the icon and you will see the Surveys & Polls main page. The first thing you will see is a list of all the created surveys to date and their status:
Create a new survey
To create a new Local Survey, click on [ + ] plus button on the upper right corner of the screen then click on New Survey. A modal will be displayed.
Fill in the required information.
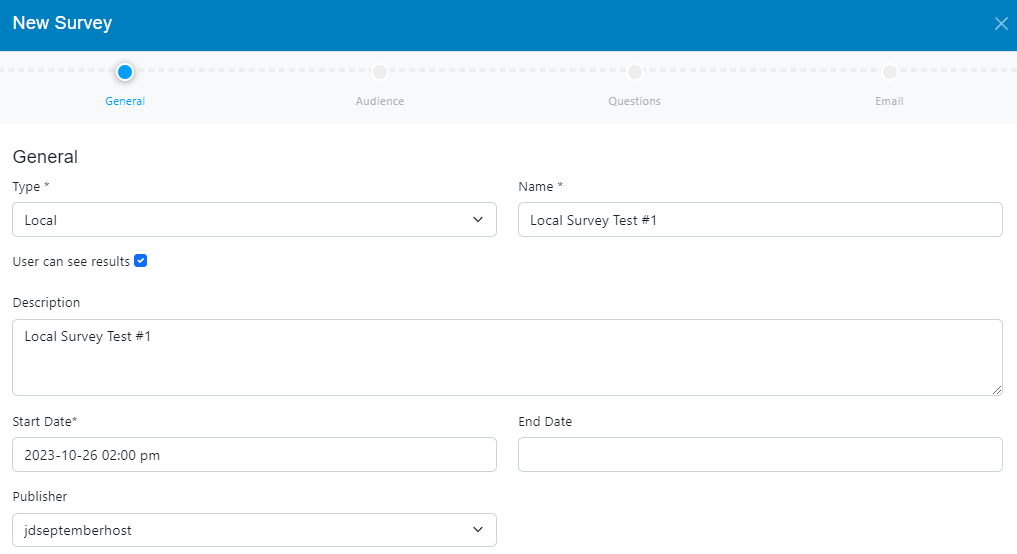
• Type: choose Local Survey from the drop-down menu.(this option allows you to send a survey to a group of users on your node)
• Write the name you want to give the Survey
• Check de box if you want the users to see the results
• Write a description for the Survey (optional)
• Select the Launch Date, to define when the emails will start being sent out
• Select the Close Date when the system will stop tracking the Survey (optional)
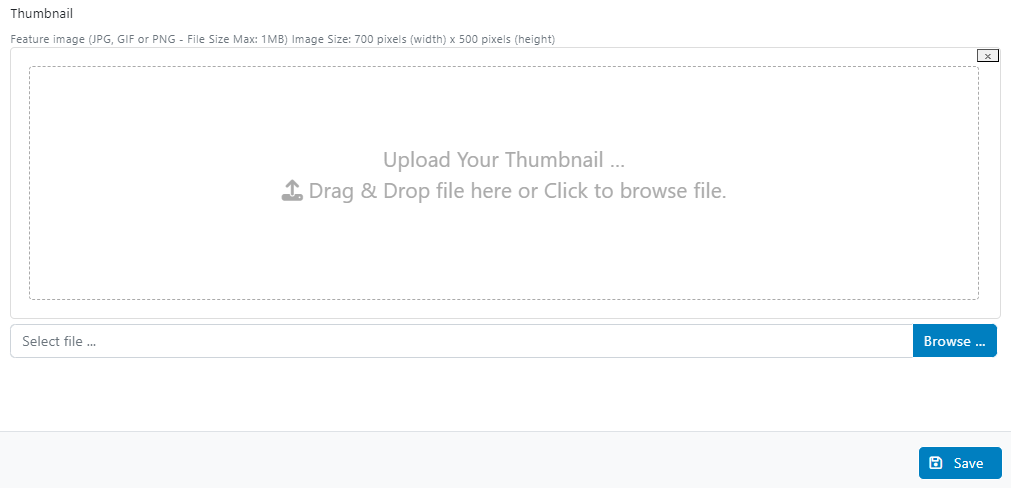
• Upload a thumbnail (optional)
Click on the Save button.
After clicking on the Save button three new tabs will appear Audience, Questions and Email.

Click on the Next button.
Audience Tab
In the Audience tab you will select the user groups to which the Survey will be sent.
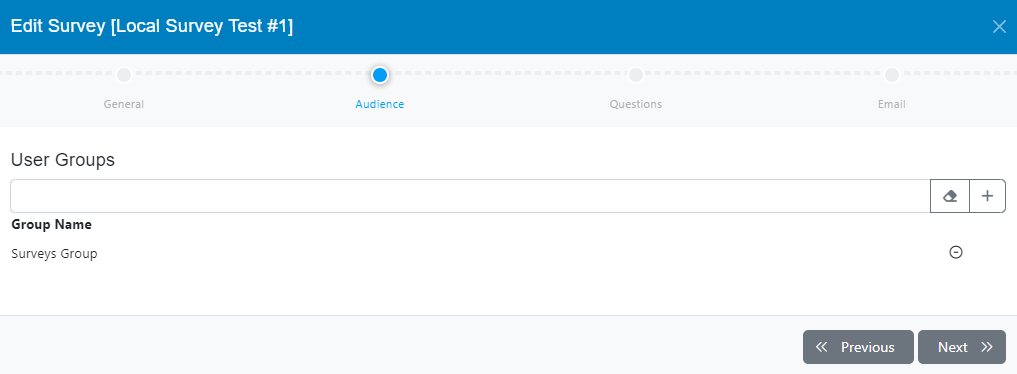
You can add one or more of the user groups available by clicking on the [ + ] button. You can also remove groups by clicking on the [ – ] button (groups should have been created before, check the Users Groups documentation).
Click on the Next button.
Questions Tab
In the Questions tab you can create the different types of questions to be shown in the survey.
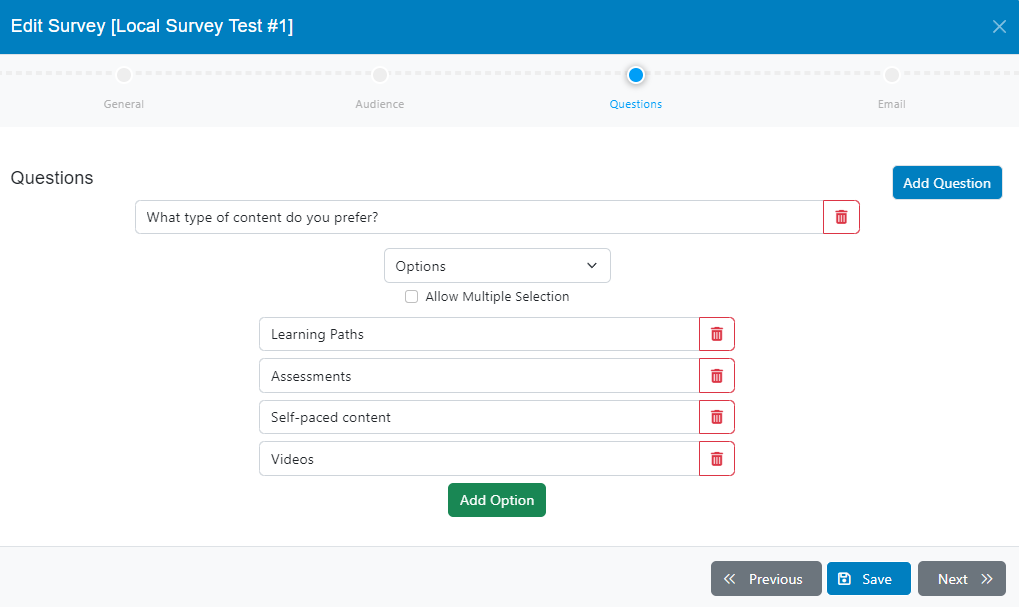
Three types of questions are available
- Questions with single answer.
- Questions with multiple answers.
- Questions with text-type answers.
You can add as many questions as you need, you can also delete them.
Click on the Next button.
Email Tab
In the Email tab, you can choose the Email Template you want to send to the target users to inform them about the survey (check the documentation related to mail templates).
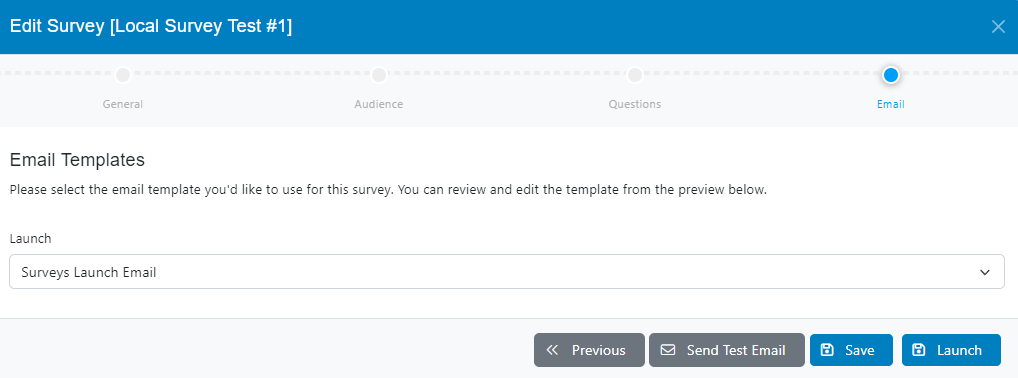
Send Test Email
To test your Local Survey before launching, on the lower right side click on the Send Test Email button.

Type the email address where you want to send the Test Email and click on Submit.
Verify that you have received the test email as it should be.
Click on the Save button.
Launching the local survey
Click on the Launch button, this will send the Local Survey to the selected user groups.
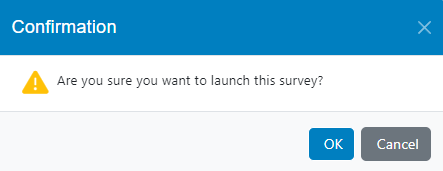
The Local Survey will now be activated, and the email blast will be sent according to the defined start date and email template.