Para crear un nuevo paquete desde la ventana principal de ECM, haga clic en el icono azul del signo más situado a la derecha de la barra de búsqueda.
Cuando aparezca el menú, haga clic en Crear paquete. Aparecerá una nueva ventana con campos vacíos que requieren información sobre el nuevo paquete que se va a crear.
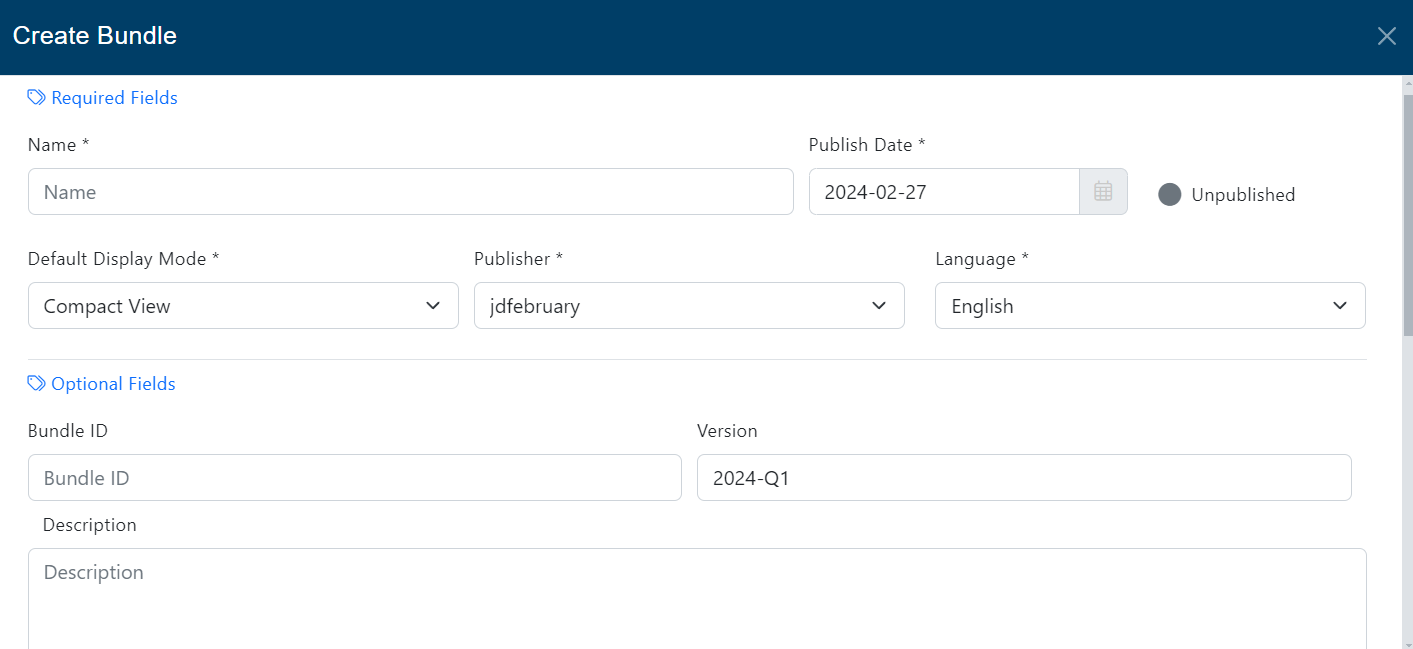
Required and Optional Fields
Fill all the required information like Name, Publish Date, Display Mode, Publisher, and Language. Also, you have the possibility to fill optional information like Bundle ID, Version, and a short Description about the Bundle, so users will know what they are going to find out.
Scroll down to the next section.
Sección de etiquetas
In this section, choose the tag values that will make the Bundle easier to search & find by the user. The available tags must be created separately using the Manage Tags functionality (see the corresponding documentation).

After selecting the tag values, scroll down to the next section.
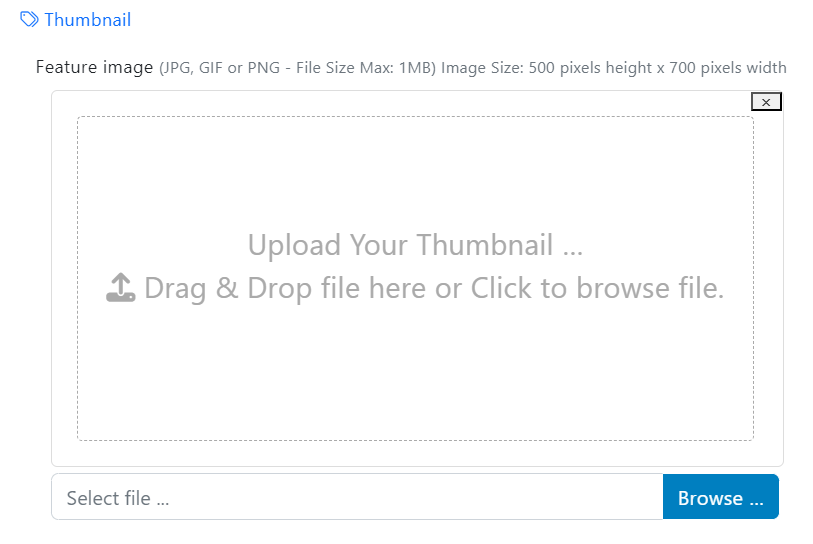
Thumbnail Section
Lastly, upload a thumbnail image for the new learning path. For best rendering, the thumbnail should be 700 x 500 pixels, the following formats are supported: (gif, png, and jpg).
Once you have completed the information, click on Save and close the window.
Bundle expansion pane
After you close the creation window, the new Bundle expansion pane will be automatically opened. You will see all the information and some action buttons.
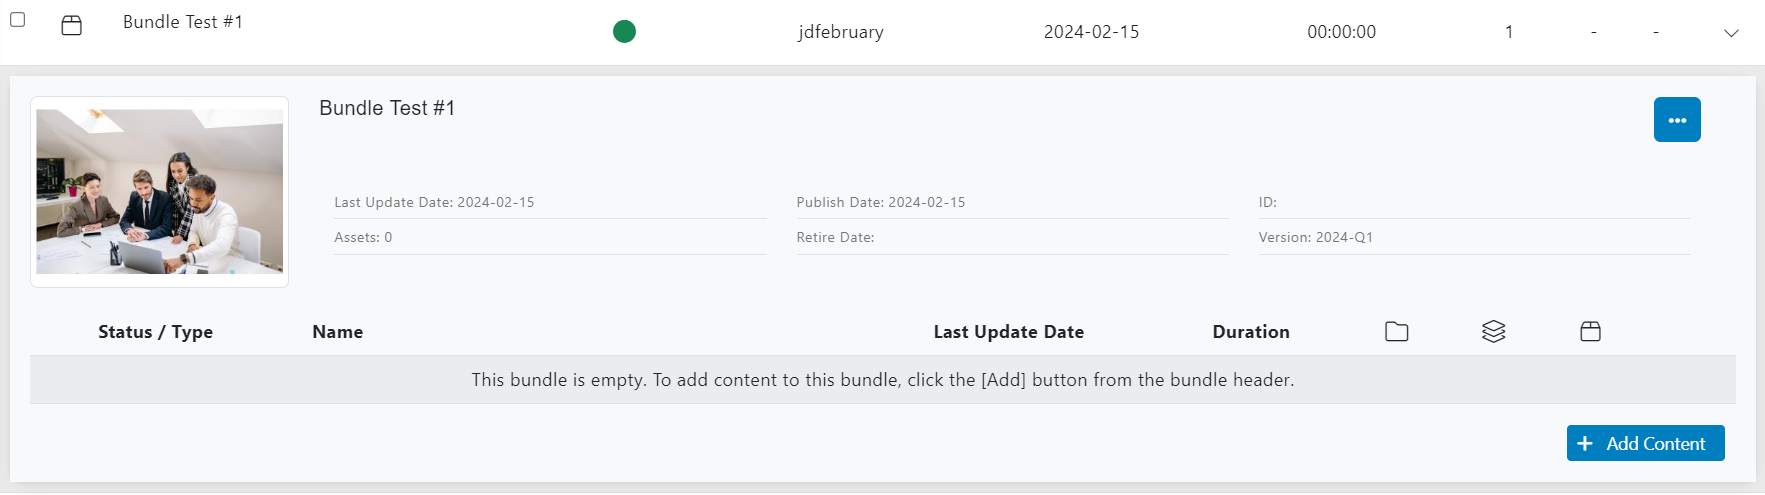
Add Content
Click on the Add Content button to start adding content to the Bundle. A new window will pop up and you will see a list of available libraries that you can explore and navigate them to find assets to be added.
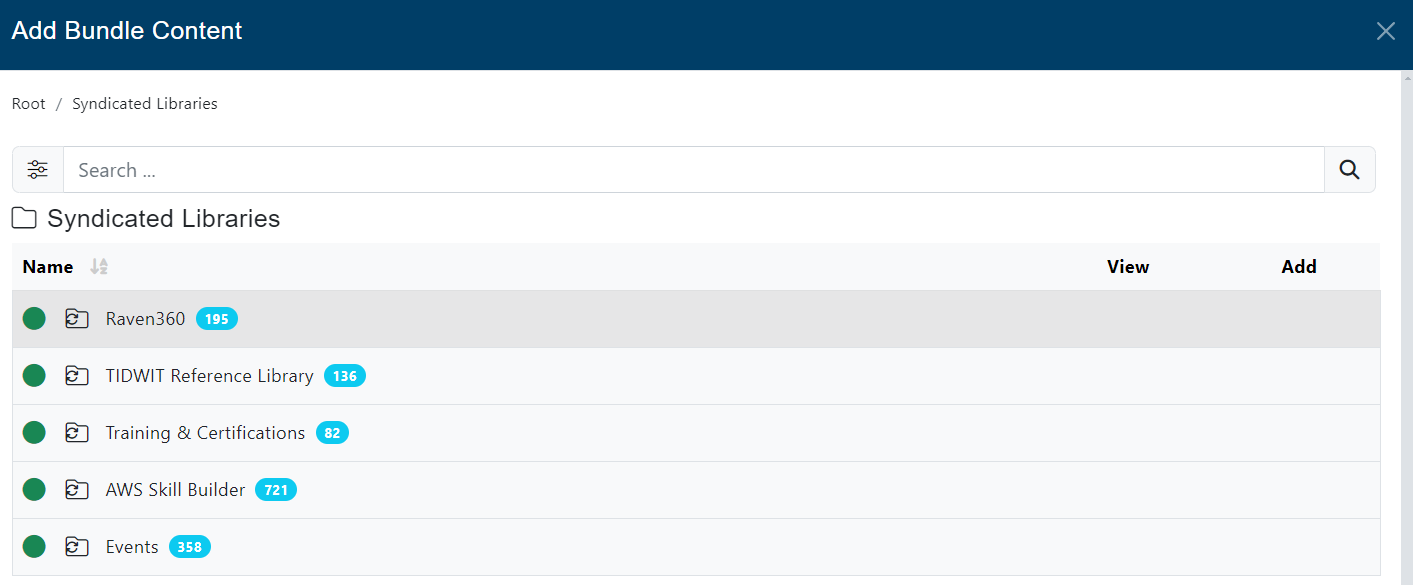
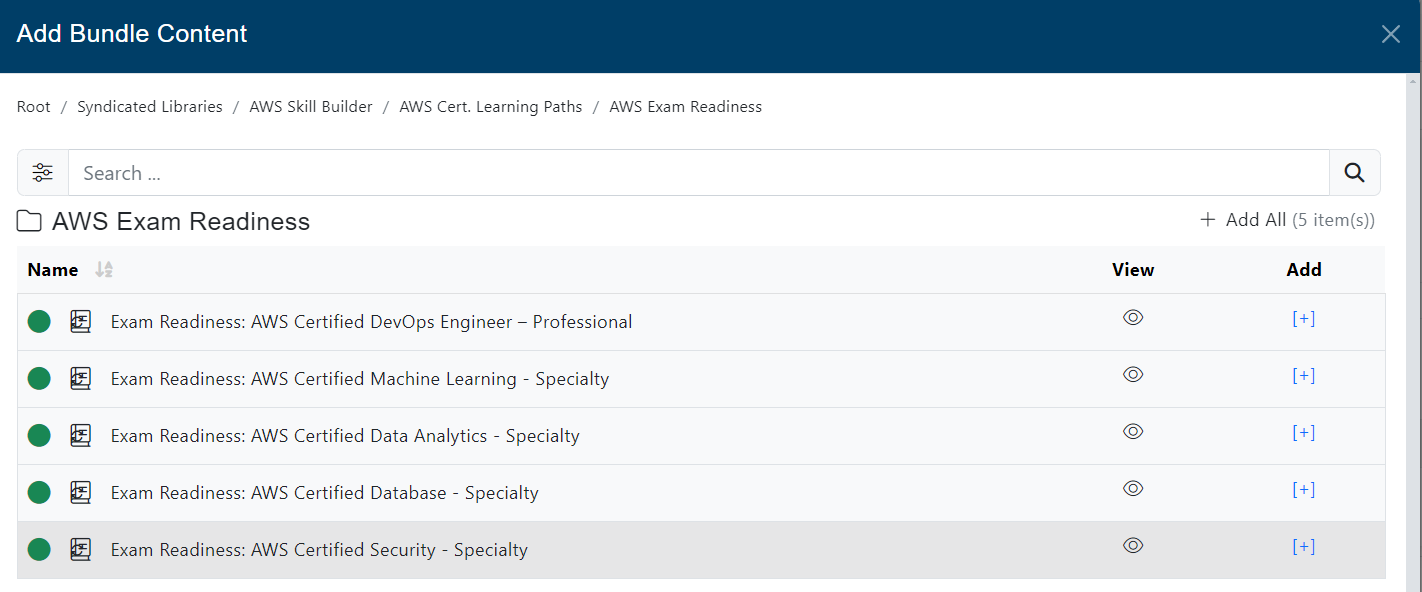
When you open a library, you will see a list of assets. If you want all the items in the list, you can click on the + Add All link. Otherwise, you can select them one by one clicking on the [ + ] plus button.
También puedes utilizar los filtros para buscar contenido específico:
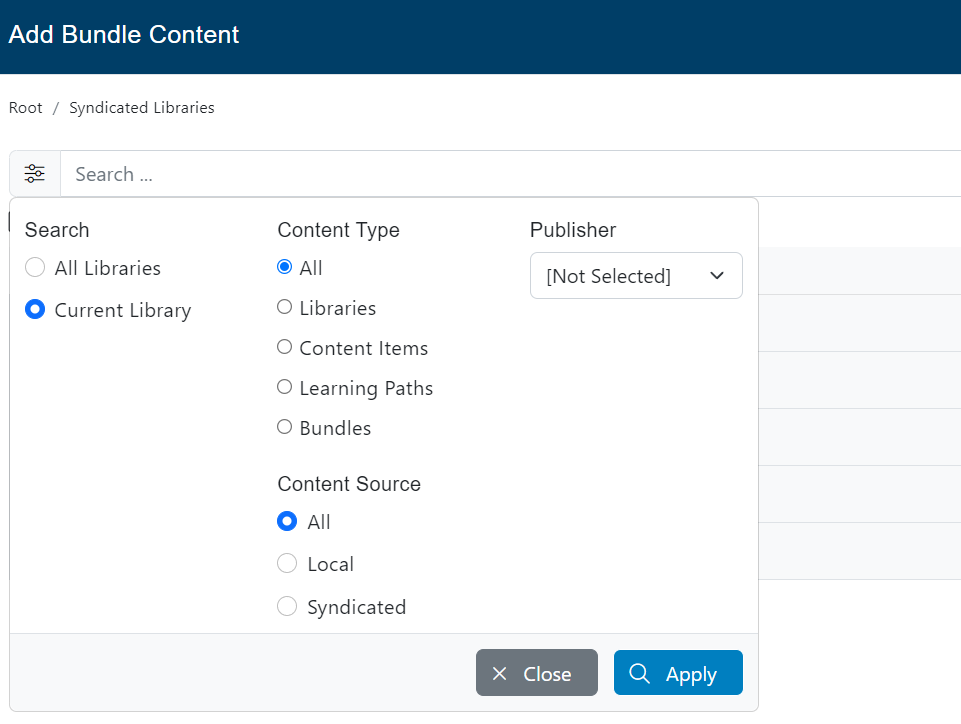
Una vez que selecciones los filtros, haz clic en "Aplicar".
Manage the Bundle
Once you have added the Content, Close the window and now you will see the added content in the Bundle expansion pane, you can see the type of content and its status (green for published, gray for unpublished).
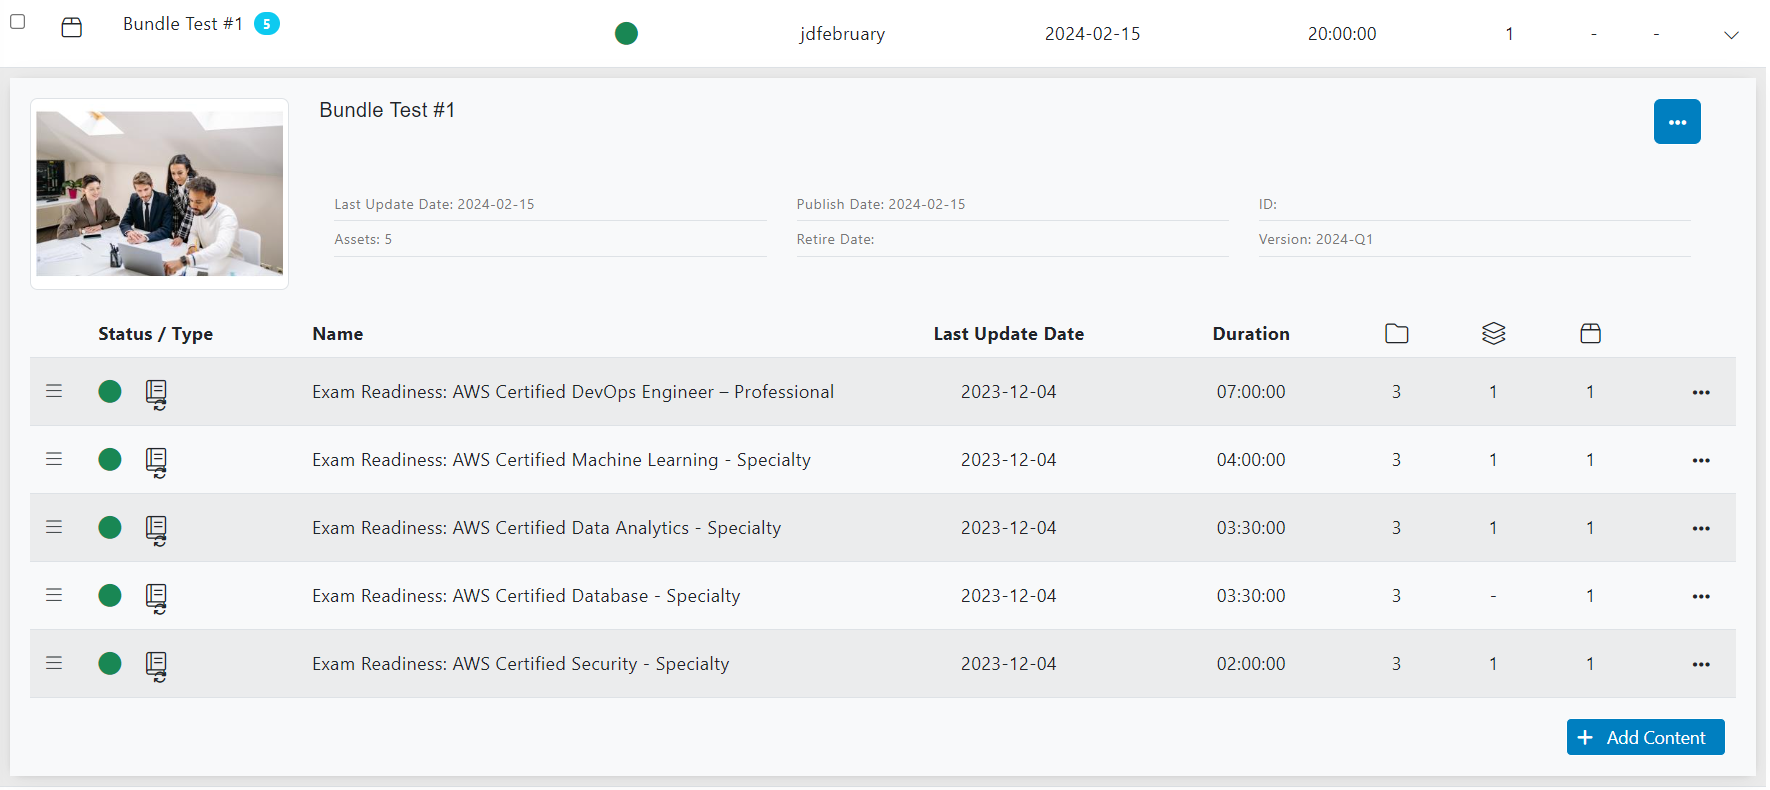
You can Preview, Edit, Remove from Bundle, Add to Learning Path, Add to Bundle and Add to Library clicking on the three-dots button from the Content.

Back to the Bundle expansion pane, you can also click on the three dots button to see more actions:
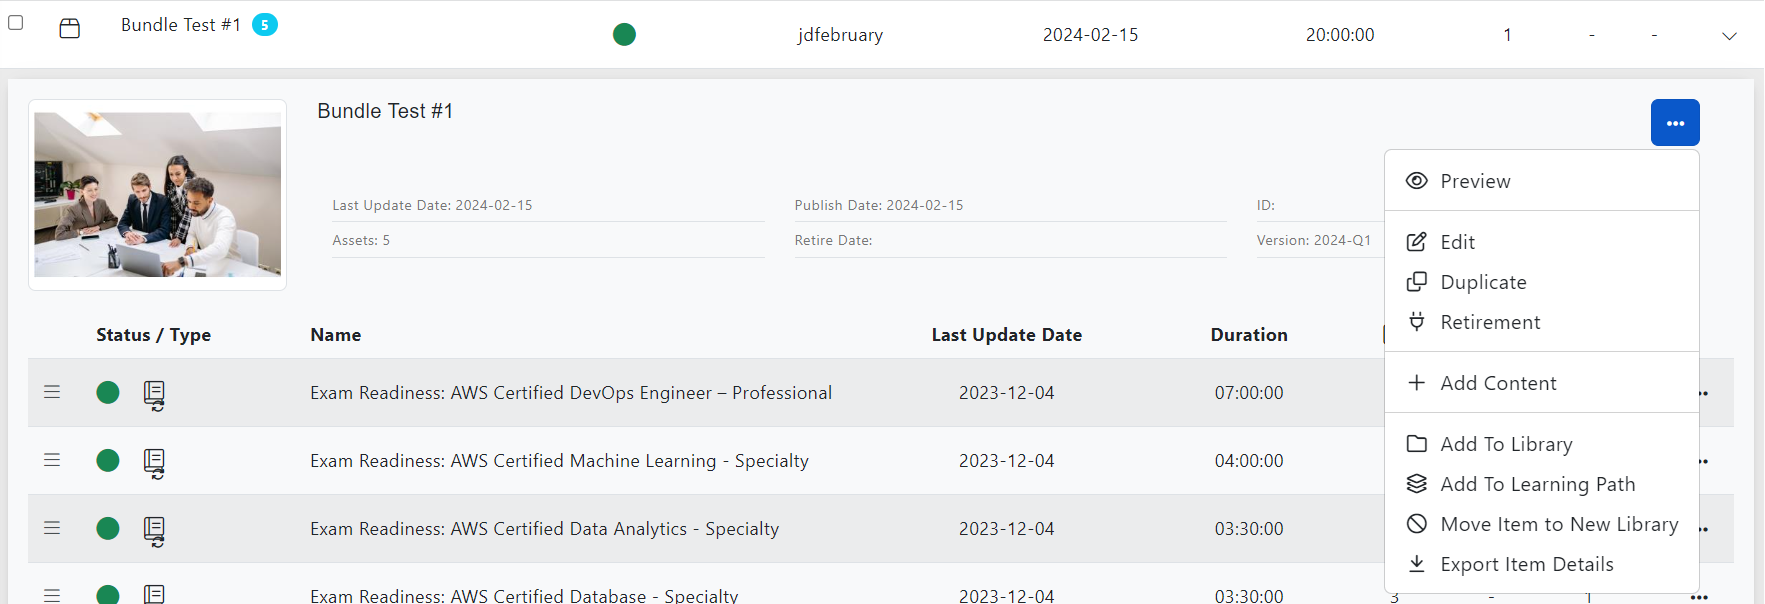
You can Preview, Editar e Duplicate, Add To Library, Add To Learning Path, Move Item To New Library e Export Item Details.
You can also set a Retirement Date and define if it has Replacement.
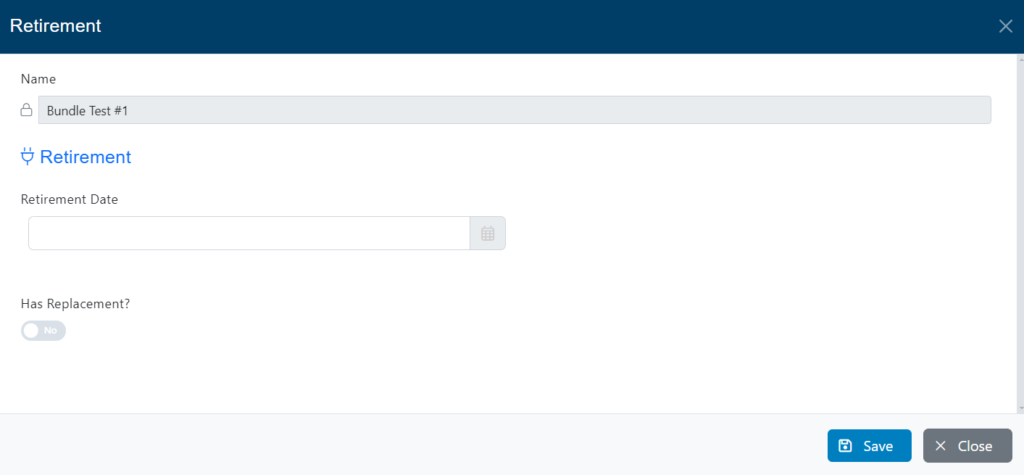
Additionally, check if the Bundle has replacement or not. If you check Yes, select the new content that will replace it after retirement.
Click on Save to save all changes and close the window.
Add To Library
Click on Add to Library to map the Bundle to a library. A new window will pop up.
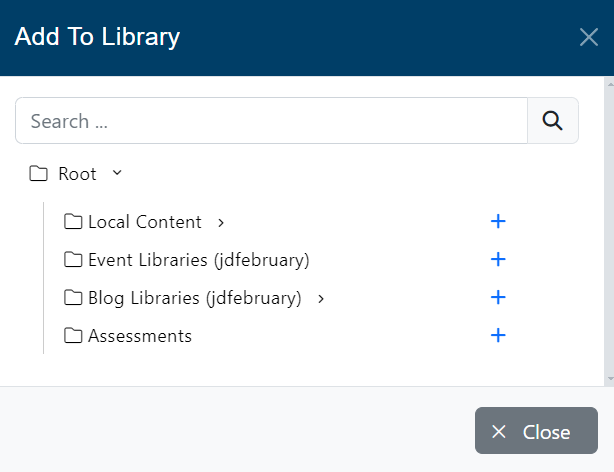
Click on the Plus button of the library in which you want to map the Bundle, then you can close that window.

The Bundle will now appear inside the mapped libraries.
Check the Bundle expansion pane, you can visualize how the content is mapped to Libraries, Learning Paths, or Bundles.
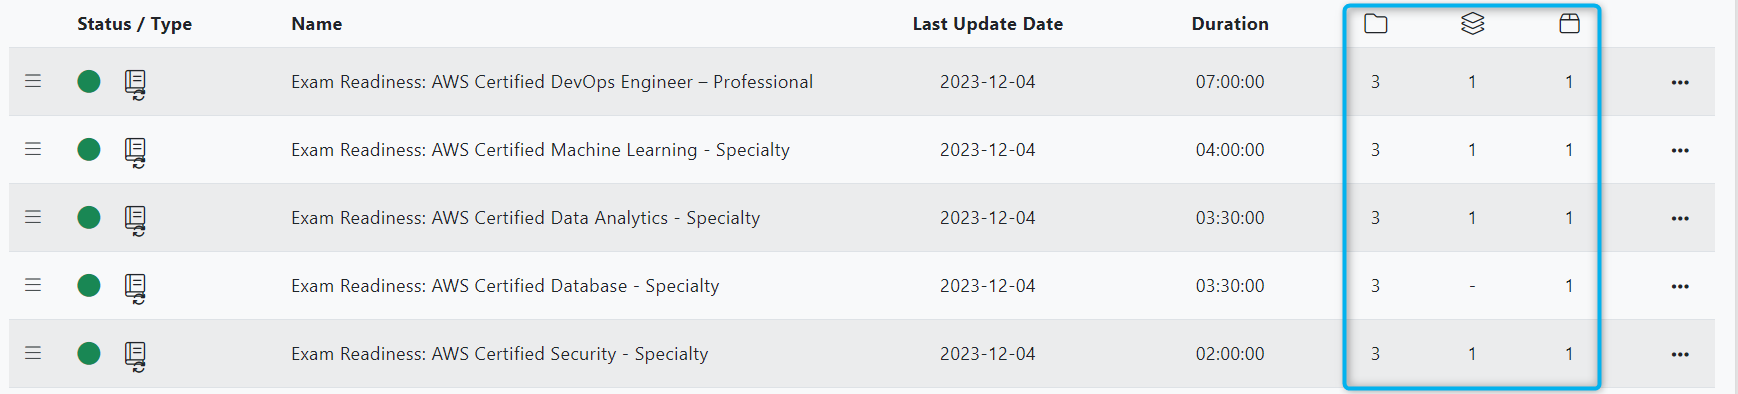
You can Preview, Edit and Remove. Note: You cannot remove Syndicated Content.
Publish
If the Bundle status is unpublished, click on the Publish button in the expansion pane to publish it immediately.
