INICIA SESIÓN EN TU ECOSISTEMA TIDWIT

En la esquina superior izquierda, haga clic en el botón de Menú. El panel lateral izquierdo se mostrará y verá iconos correspondientes a las diferentes aplicaciones y cargas de trabajo disponibles en TIDWIT. Los tres primeros iconos corresponden a la sección de Usuario, que se explica en el Manual de Usuario. Los iconos restantes solo son visibles con un perfil de administrador. Si no puede ver los iconos de administrador y es un administrador, consulte con el administrador de su portal de TIDWIT para que le otorgue los permisos necesarios.
Plantillas de correo electrónico
Para acceder a la aplicación de Plantillas de Correo Electrónico, coloca el puntero del ratón sobre el icono de Configuración. Aparecerán tres pestañas nuevas, cada una con funcionalidades de configuración diferentes.

Haz clic en la pestaña de Plantillas de Correo Electrónico y serás dirigido a la ventana de Plantillas de Correo Electrónico.

Verás una barra de búsqueda que puedes utilizar para encontrar plantillas, una lista de las Plantillas de Correo Electrónico creadas y el botón + Crear Nueva Plantilla de Correo Electrónico.
Menú desplegable "Tres puntos"
On the Email Templates app main page click on the “three dots” button of any existing template to see its options.
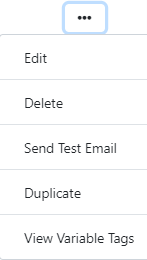
- Click on Edit to edit or modify an existing email template.
- Click on Delete to remove the Email Template from the list. This action cannot be reversed.
- Click on Send Test Email to send a test email to verify the template is working properly.
- Click on Duplicate to make a copy of the template. This can be very useful when you want to reuse the structure and/or verbiage of an existing email, without having to rebuild the entire template from scratch. You can change the name, the properties, and edit the newly duplicated template as needed.
- Click on View Variable Tags to see the available variable tags for the template you selected.
Pestaña de Información Básica
Click on the + Create New Email Template button and you will be directed to the Email Template Basic Information Tab.
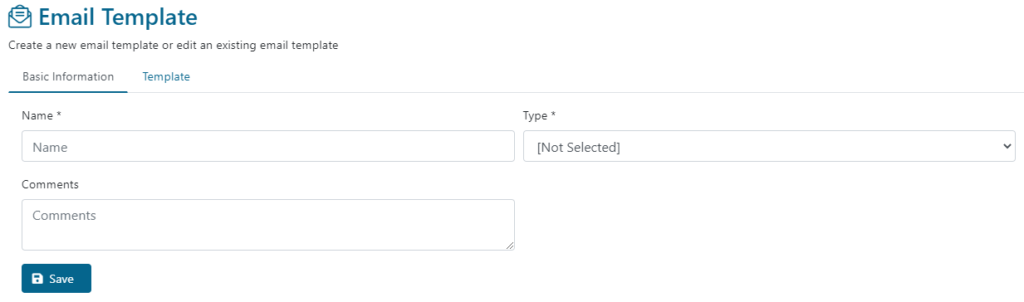
Give a name to the template and on the Type dropdown menu select the template type.
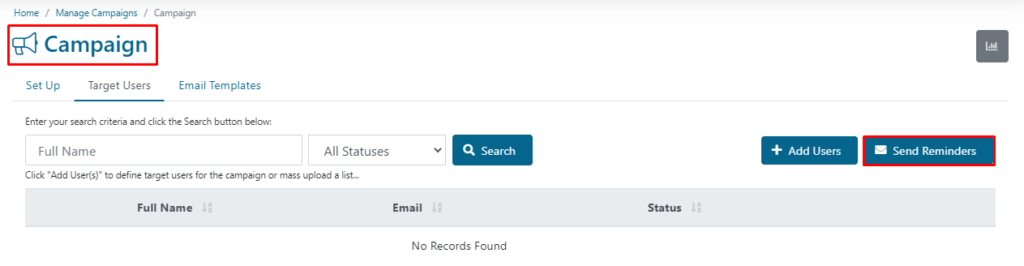
If you want to send an Email Blast or if you want to assign specific learning path(s) to a target list of users, make sure you select the Learning Campaigns: Launch and/or Learning Campaigns: Reminder template type. The Launch template will be used for the first email, while the Reminder template will be used for all subsequent email reminders.
Email Reminders are accessible from the Campaigns App, within the Target Users tab, as illustrated below.
The optional Comments field can be used to describe what the new template will be used for.
When you are finished, click on Save.
Template Tab
Go to the Template tab to start creating the email template body and design.
Use the “Subject” field to populate the email subject line.

Exploring Templates Functionalities
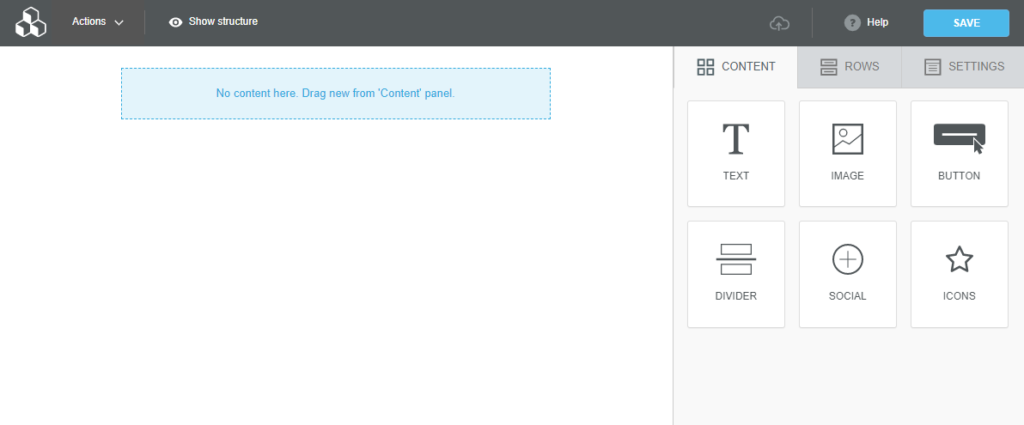
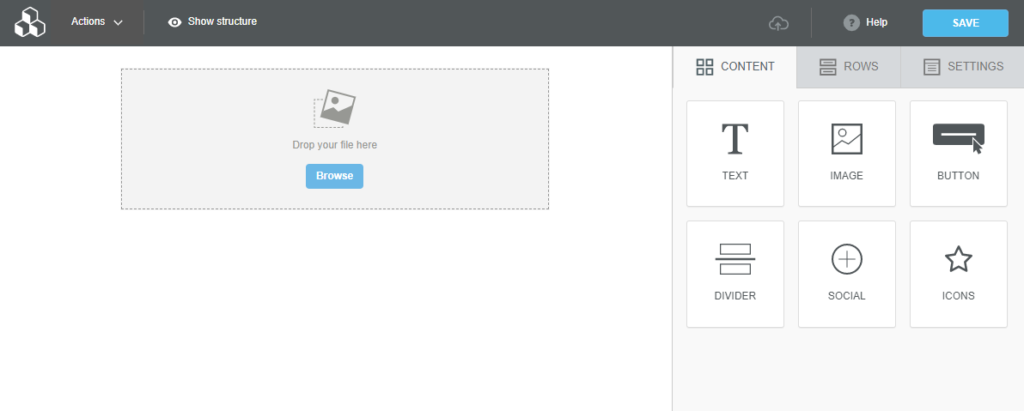
Then start creating your own template by using the “Drag N’ Drop” menu objects on the right side.
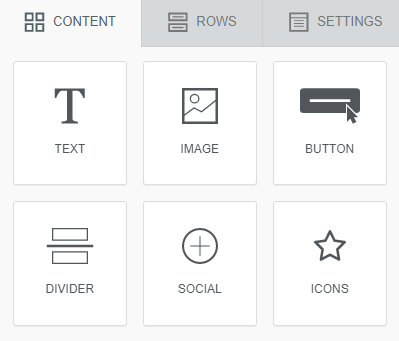
- The Content tab allows you to pick items with which you will fill the template in. You can choose to use an image, text, button box or to insert icons, page dividers, social buttons, etc.
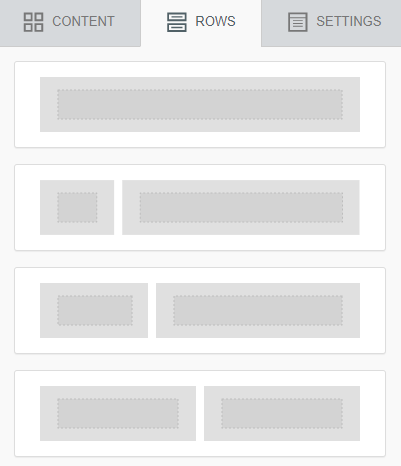
- The Rows tab allows you to organize content in the template. You can choose from a variety of different set-up options.
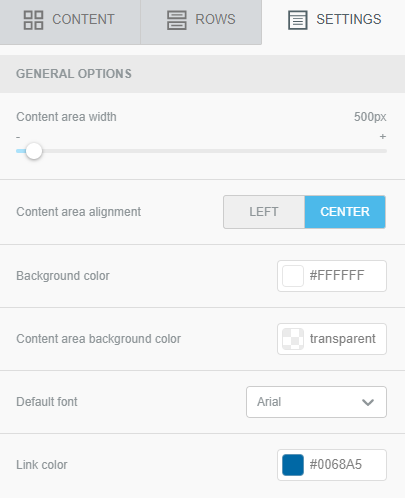
- The Settings tab allows you to change certain settings of the email template.
The blank template comes with a predetermined inserted Row, so you just have to choose the Content you want to insert and drag and drop it on the existing row.
After you drop the new content type into the row, the row will show you the option to fill the content type with its respective data (i.e. uploading an image, writing a text, naming a button, etc.).
Click on the content’s area to open the Content Properties section, which will be displayed on the same Content tab. This will allow you to change settings of the chosen content like its width on the template, insert URLs, alignment, link to another page, etc.
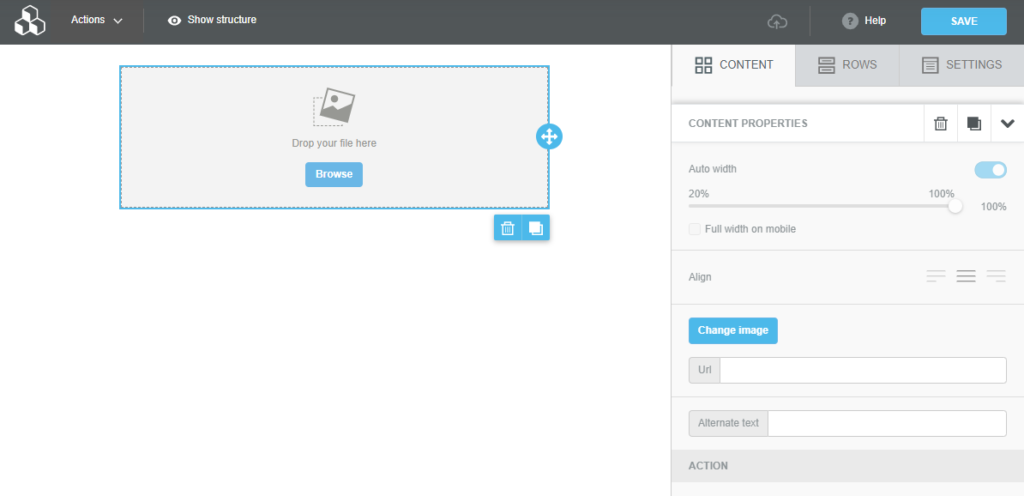
Click on the thrash can button to delete the row/content.
Click on the Duplicate button to duplicate the row/content inside the row.
On the Content Properties tab, you will find three buttons. The first two have the same function as the ones described above. Click on the arrow to close the Content Properties.

Variable Tags
While creating the template, you can add Variable Tags to insert specific fields dynamically in your template (e.g., User First name, User Last name, Campaign landing page URL, etc.).
Example: If you insert the {User.Email} variable tag in your template, the tag will automatically be replaced by the actual email address of the user when the email is sent.
Scroll down to see the View Variable Tags button.

Click on it to see the available variable tags. They will appear depending on the template type you chose.
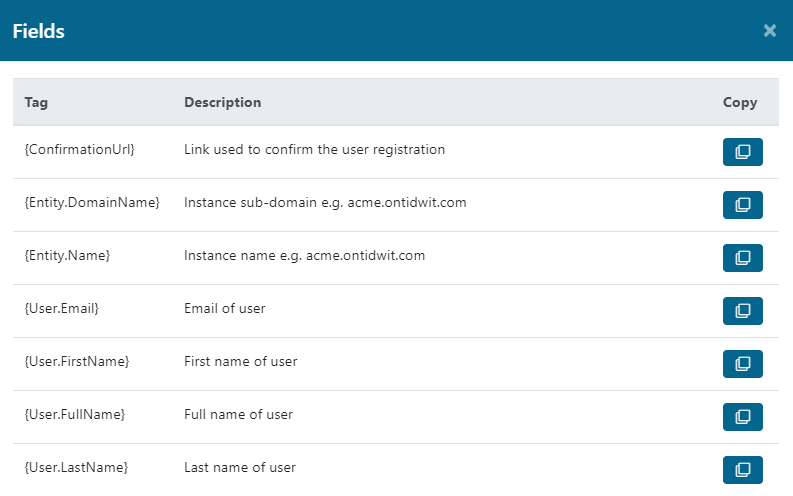
Click on the Copy button on the right side of each variable tag. Close the window and paste it wherever you want into the template.
When you paste the variable tag, it will appear between brackets, as shown on the Tag column above. Leave it like that and the system will automatically fill in the tag with the information the moment the email is sent.
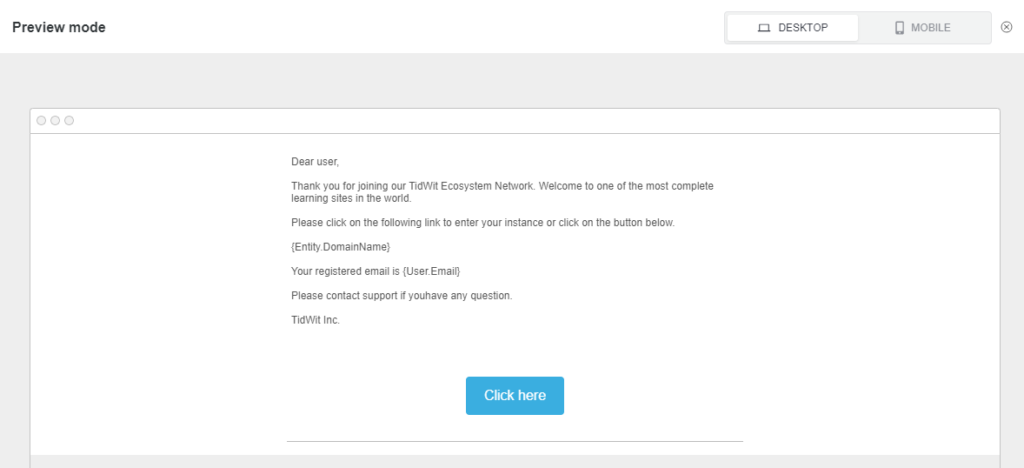
Preview
Before saving the template, you can preview it. Go to the upper left corner of the template creator and click on the Actions button. On the dropdown menu click on Preview.
(Note: The Send Test and Save as Template buttons from the Actions dropdown menu have no functionality on our platform as well as the Cloud icon on the same top bar).

The preview mode will open. You can change from desktop view to mobile view by clicking on the DESKTOP/MOBILE tabs. To exit preview mode, click on the x button in the top right corner.
Save the template by clicking on the Save button on the upper right corner or on the lower left corner.
Send Test Email

On the lower left corner of the template editor click on Send Test Email to verify the template is working properly.